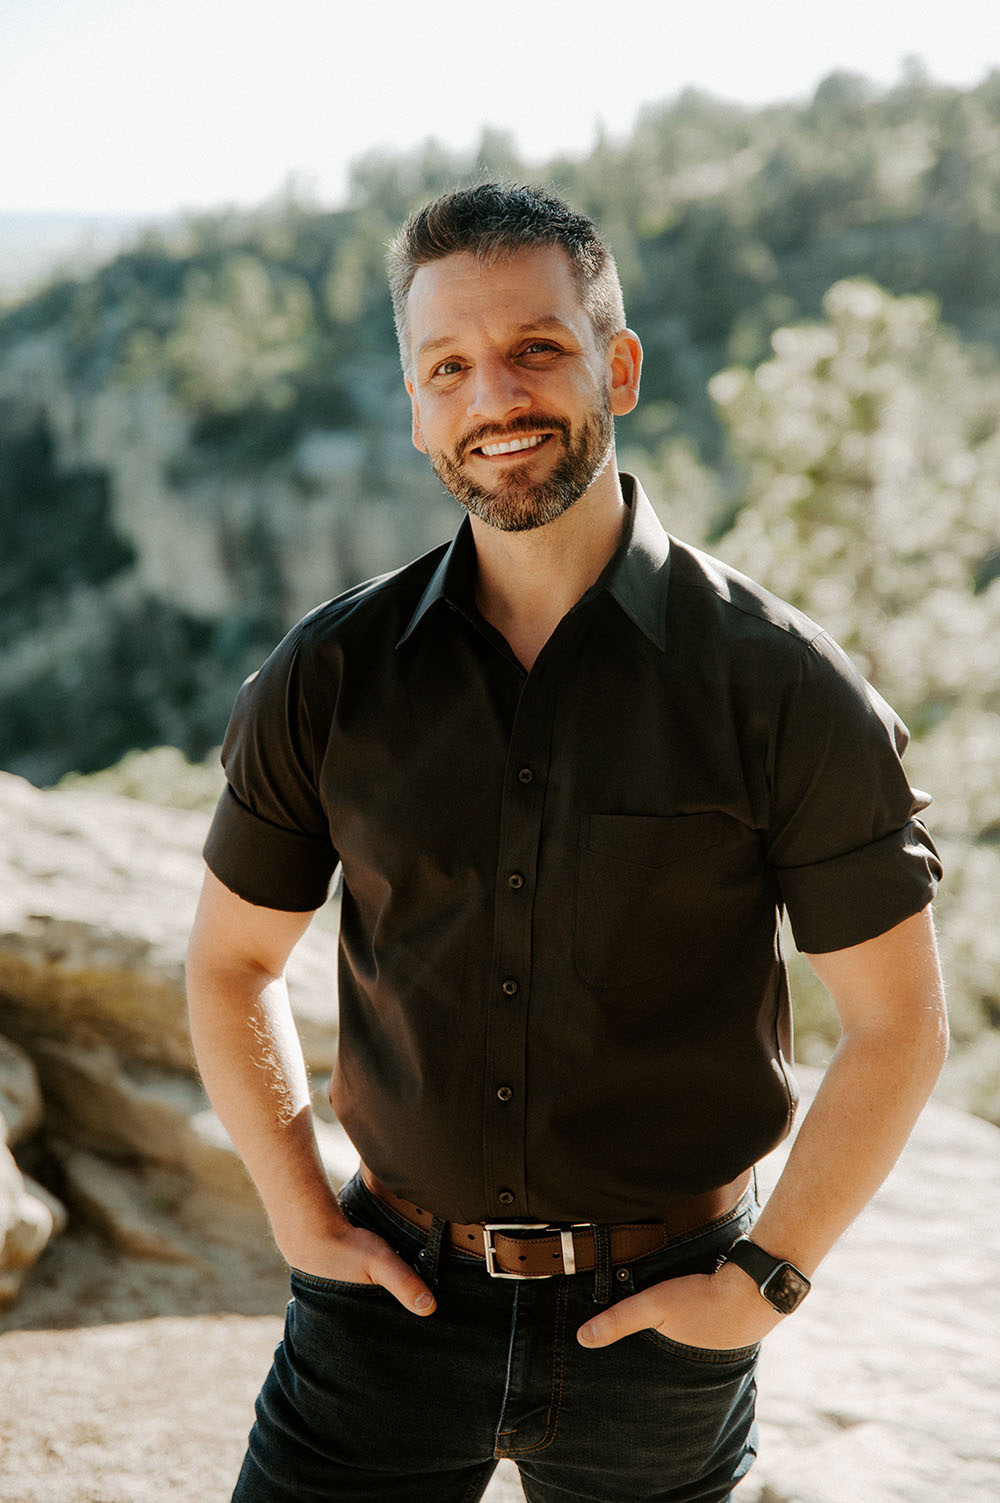
MCTech Dental Laboratory

Special Thank you to Becky Cotant of Cotant Family Dentistry for her patience and grace in agreeing to model for this walkthrough.

Photography is a powerful tool to help overcome the problematic nature of restorative dentistry. To facilitate it’s use, I made it one of my mission to master this skill when I first arrived at McTech from college. Years later and I have authored this entire walkthrough and taken almost all photos myself. If you are a restorative team member of ours, such as a doctor, assistant, or other staff member, I am at your disposal to answer any questions you may have. If you would like to partner together on documenting a case please contact me, I am very interested!

The following will show you how I take the professional grade photography that is suitable for our purposes as a lab. Part of the goal of this walkthrough is to inform about basic photography fundamentals, and to lay the groundwork for a pursuit of composition. These photos require team effort, dedicated photography equipment, and yes there is a learning curve that requires practice to over overcome.

IMPORTANT!! This guide is not intended to be an all encompassing breakdown of dental photography. This is foremost a guide to how you can take the same kind of photos I do. The plan is to build from here as I learn more and more. What I’ve published here so far is just the basics. Do not let the complexity of this guide deter you from sending us or any other lab less than perfect photos. So… with that out of the way….

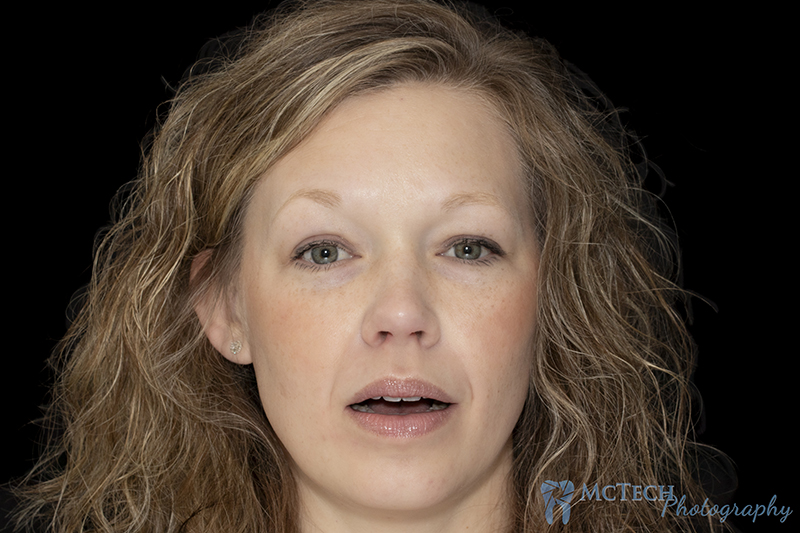
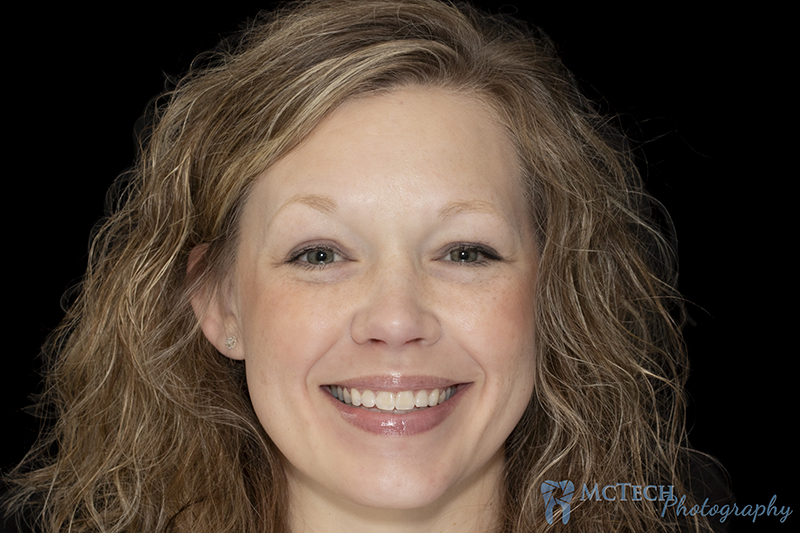
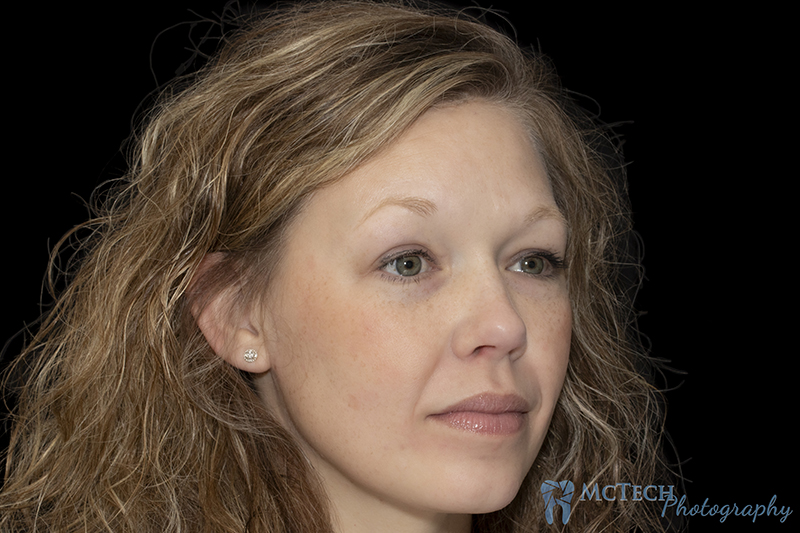
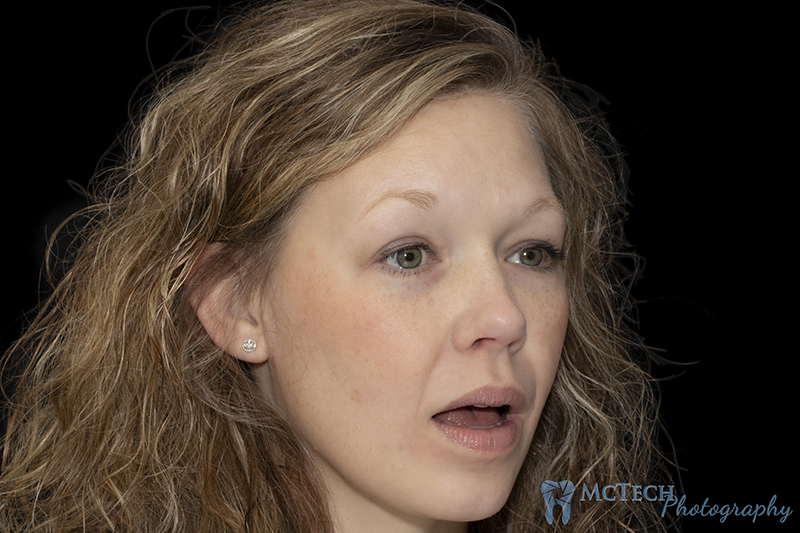
Portrait Shots

Equipment and Settings Used for These Shots

  • Camera - Canon EOS 77D ISO: 100 ; Aperture: f/11 ; Shutter Speed: 1/60 sec
  • Flash - Canon Speedlite 600EX, 1/1 (Full Blast) Manual, Fog defuser, tilted at 45º, fresh batteries
  • Macro lens – EF 100mm USM
  • Photographic Reflector in front of the patient, held at chest level, slightly tilted toward light source
  • Grey Card - white_balance grey reference card Emulation S.Hein

Techniques used for these shots

  • Keep teeth hydrated! Take breaks, do what it takes but do not let the teeth dry out. Dry teeth have a completely different color and surface and texture details are lost, distorted, or exaggerated.Grey Card - Place the grey card in the frame at the same distance as the teeth. Having a sterilized grey card touching the teeth is the best way to accomplish this. Be sure there is no glare present on the grey card See our blog for detailed instructions or click here.
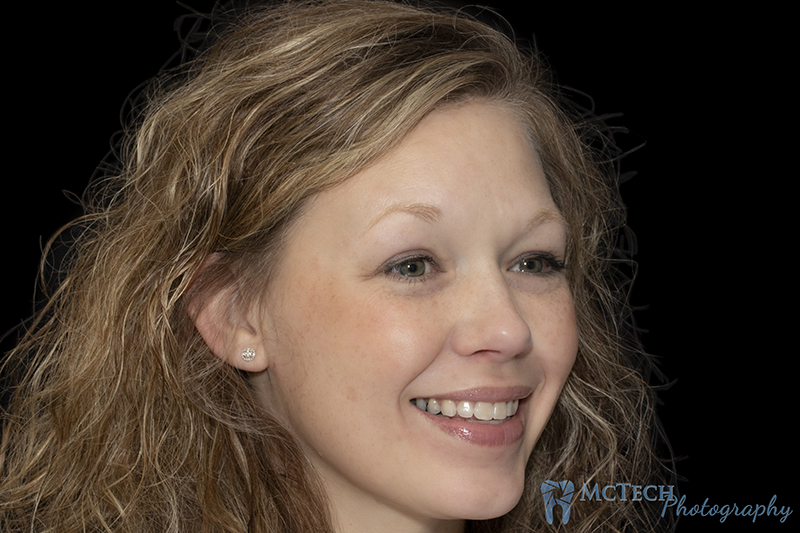
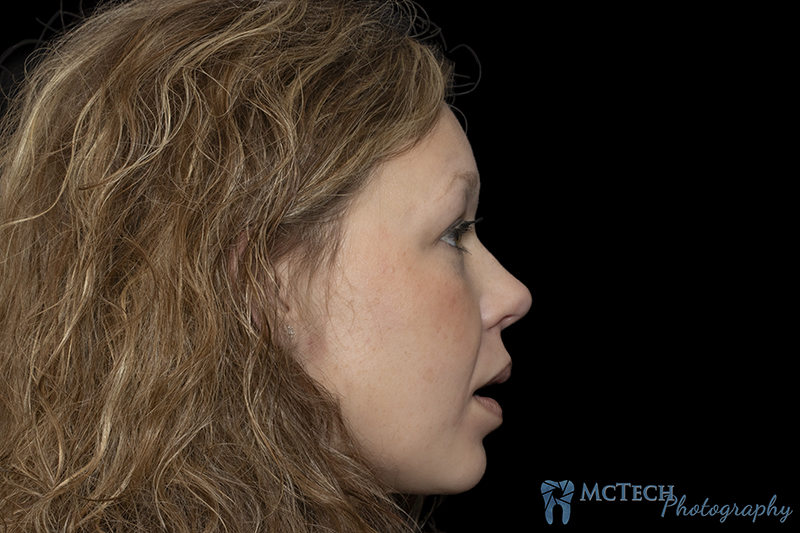
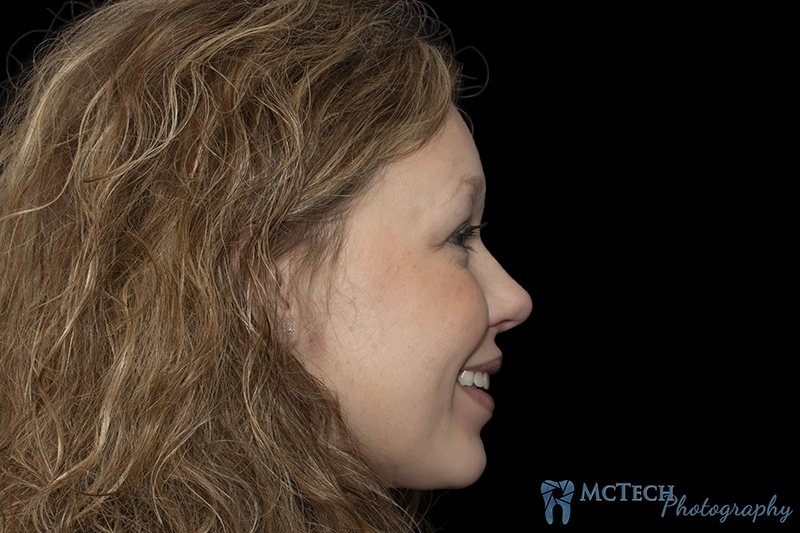
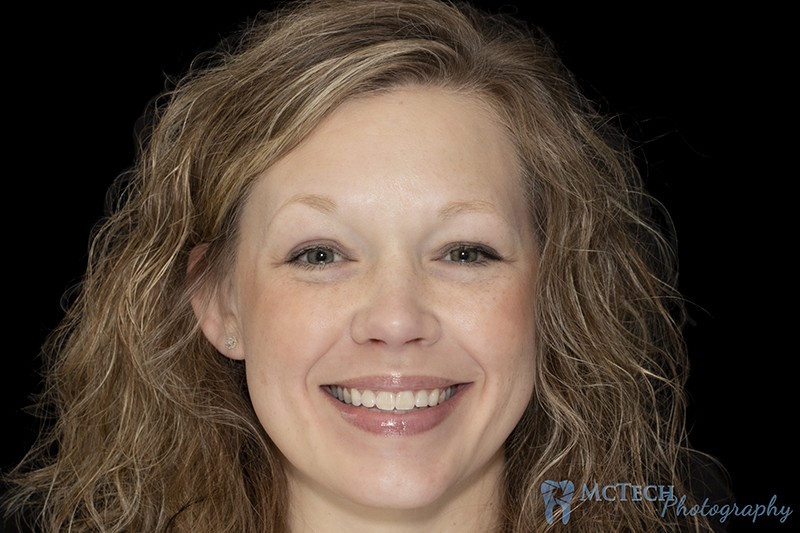
  • The image should be taken directly in front of and level with the patient. Avoid inferior or superior angulation.
  • Capture the whole face from the top of the head to the top of the neck.
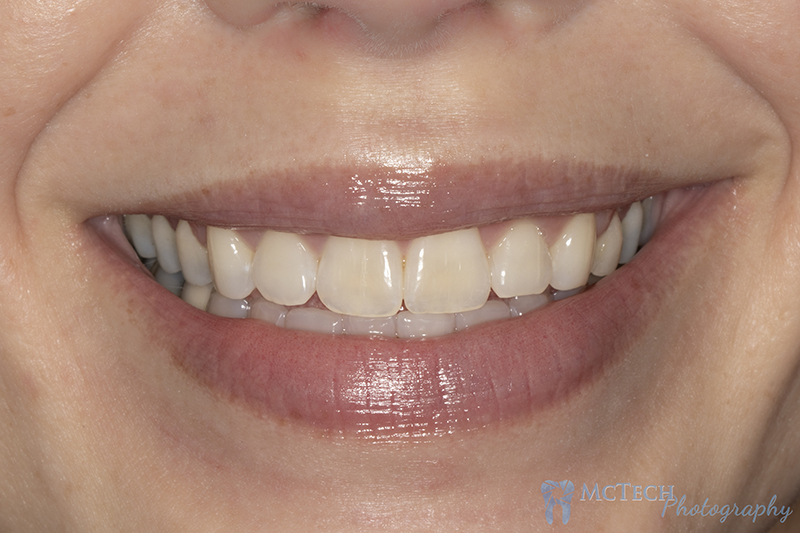
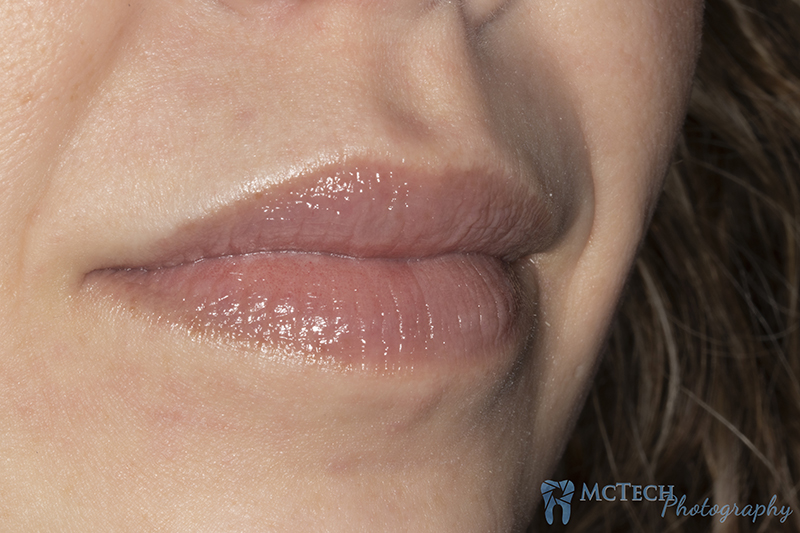
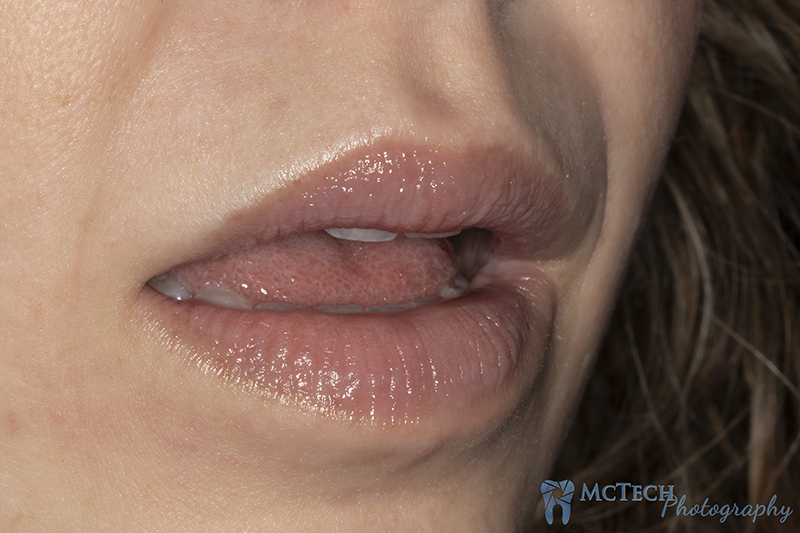
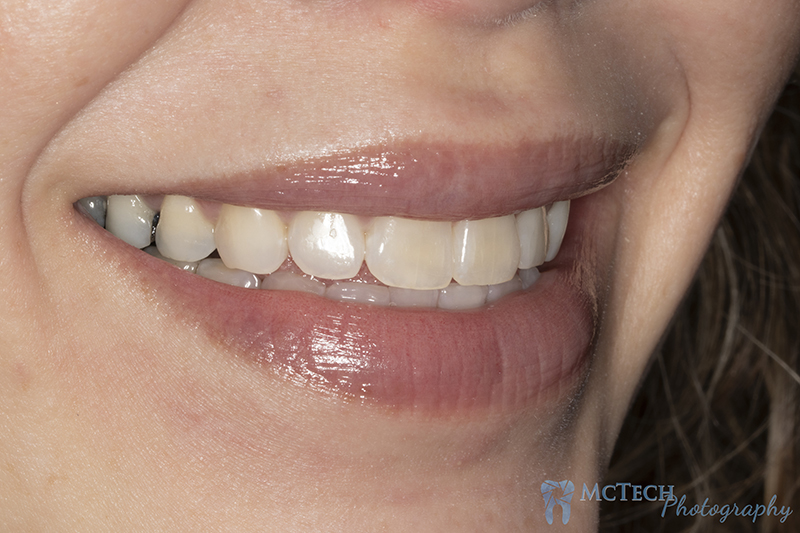
  • For all angles. 3 shots are taken. One with no smile and no teeth, one in repose (mouth at rest and open with teeth apart), and one with the patients largest toothiest smile.

Instructions to the Patient

  • Have the patient clean their teeth (brushing and flossing) and instruct them to avoid hard flossing or brushing that would inflame the tissue. Before every shot, eliminate debris and distractions such as excessive saliva, plaque, calculus, blood, food debris, makeup, glove powder, and lipstick on teeth, etc.
  • Instruct patient to avoid tilting their head back when smiling or opening their mouth, this is a natural mechanic of the body. Ask the patient to sit straight up with good posture- this will have the added effect of producing a more genuine and realistic smile, while keeping their chin off their chest and thus tilting their head.

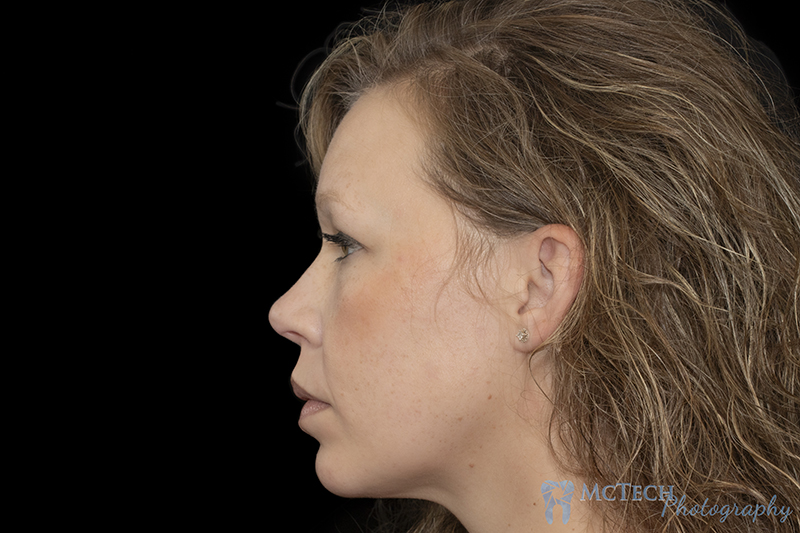
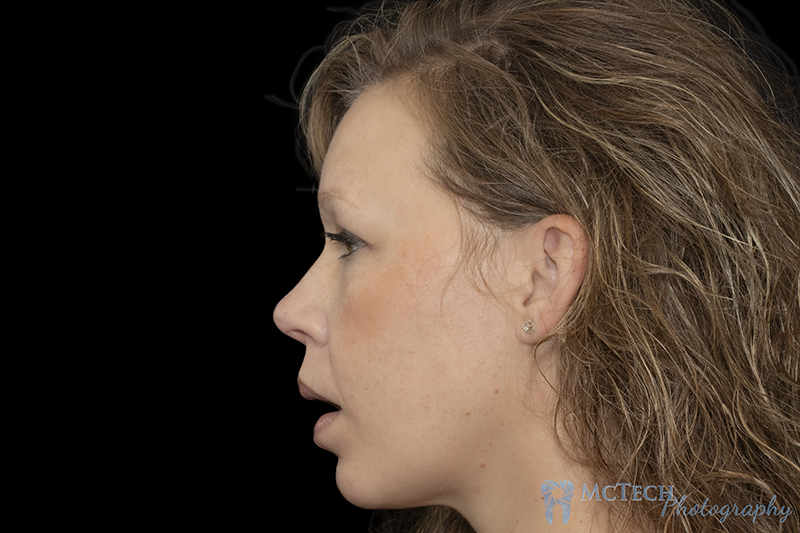
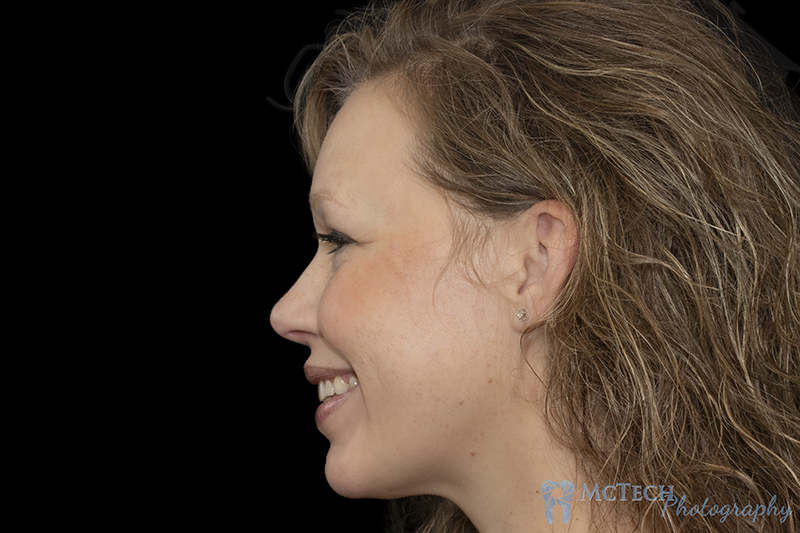
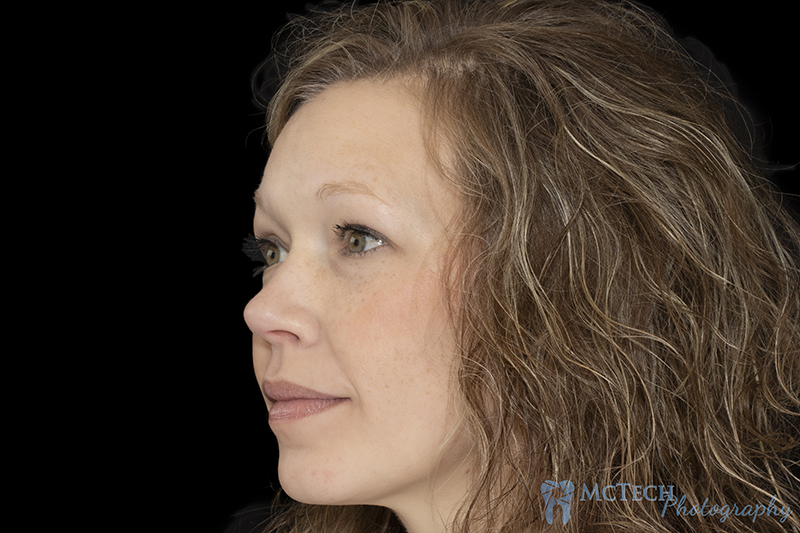
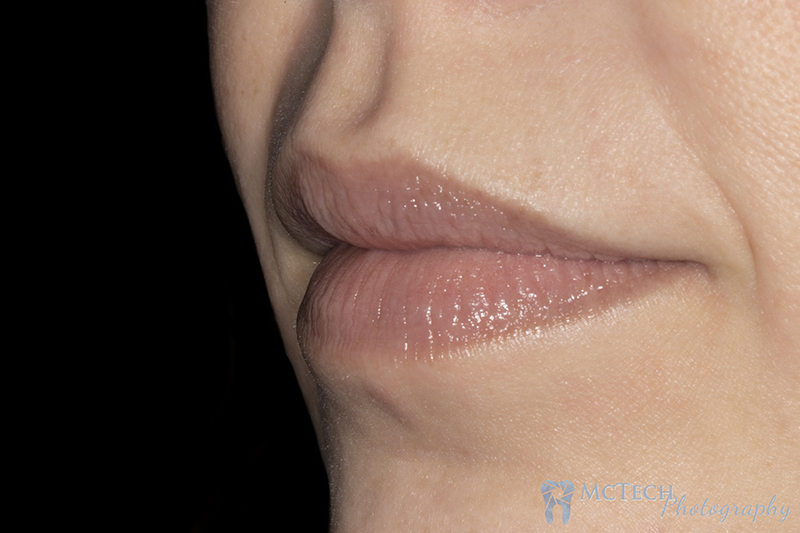
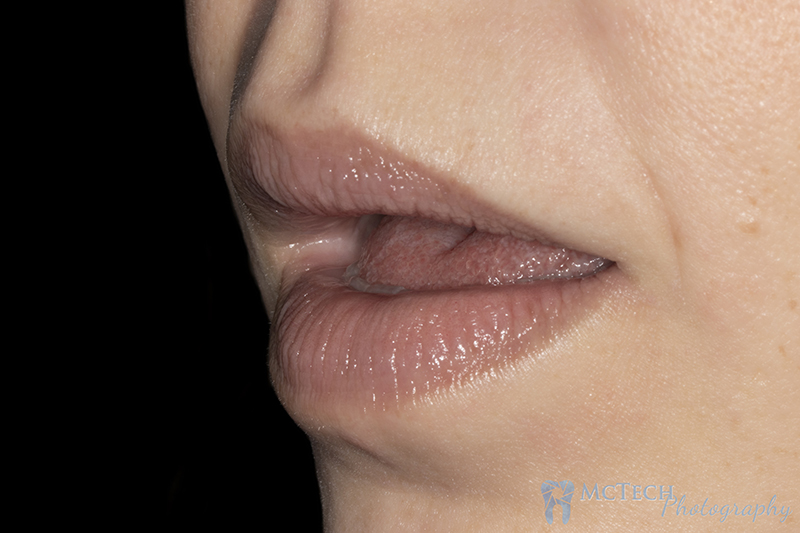
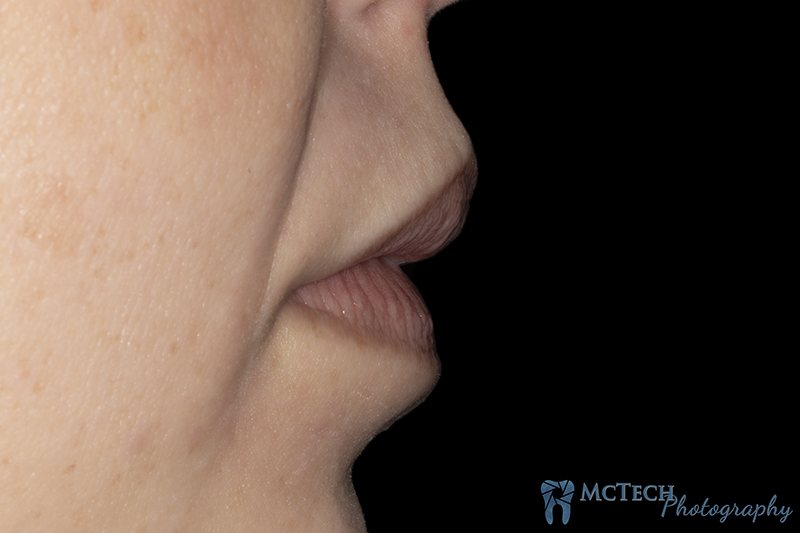
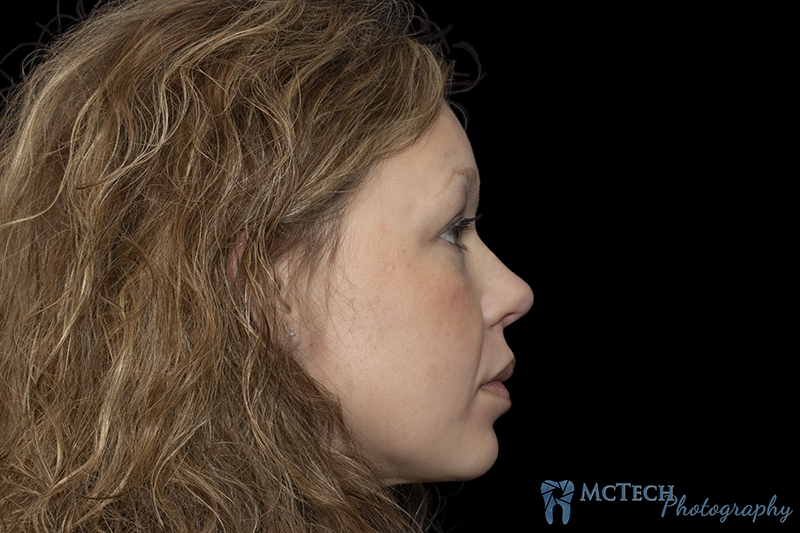
Portrait 1: 90° Left Profile / a.Not Smiling, b.Mouth in Repose, c.Full Smile

MCTech Dental Laboratory

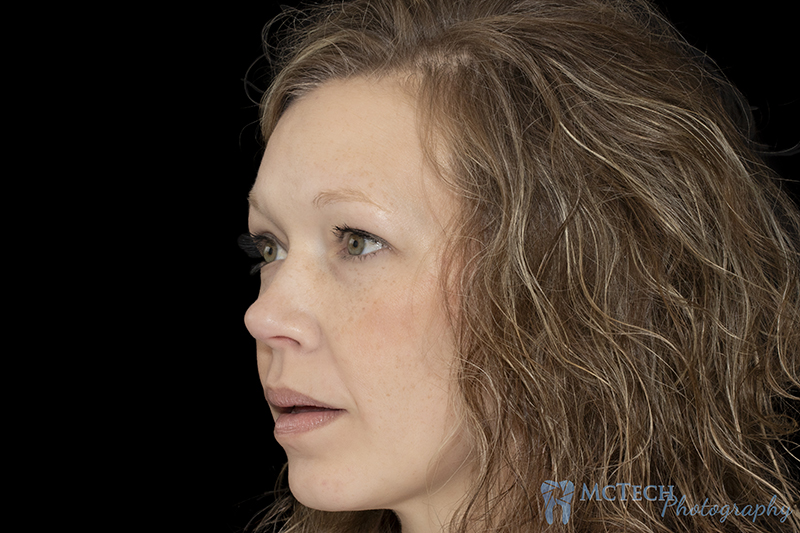
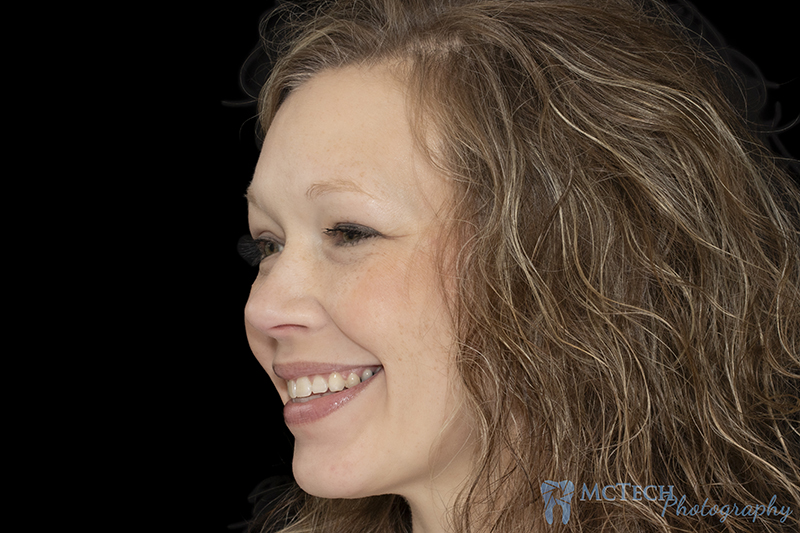
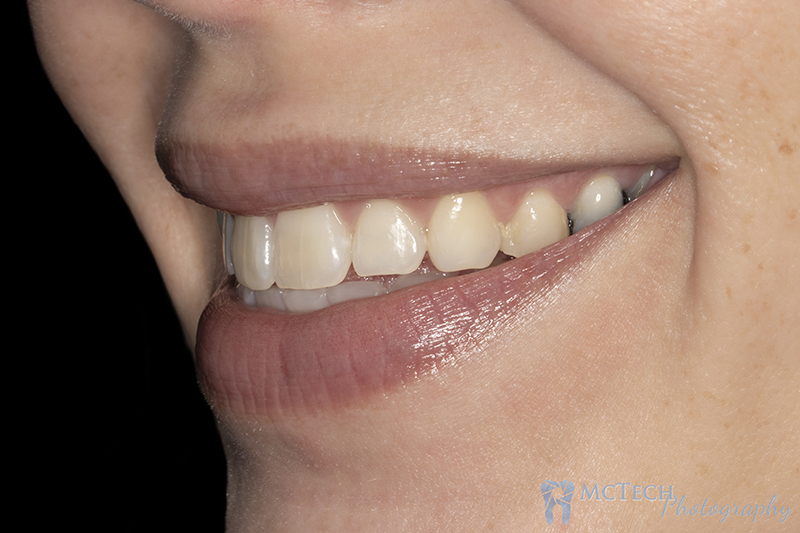
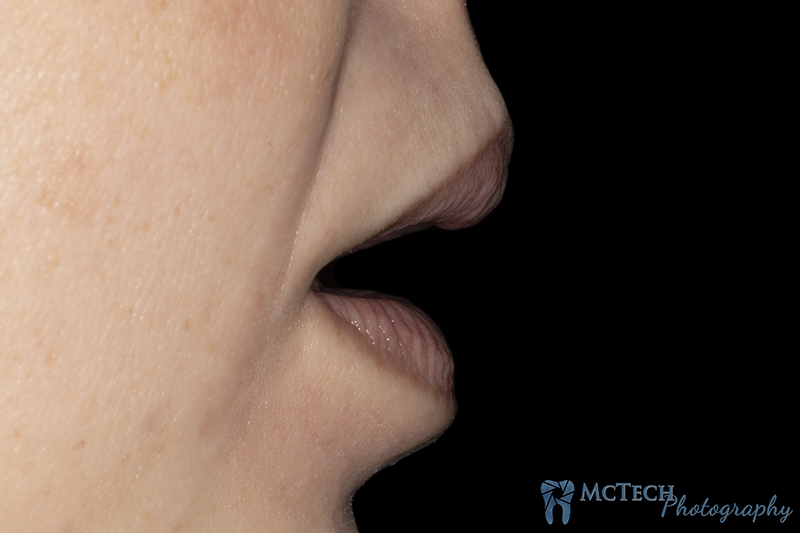
Portrait 2: 45° Left Profile / a.Not Smiling, b.Mouth in Repose, c.Full Smile

MCTech Dental Laboratory

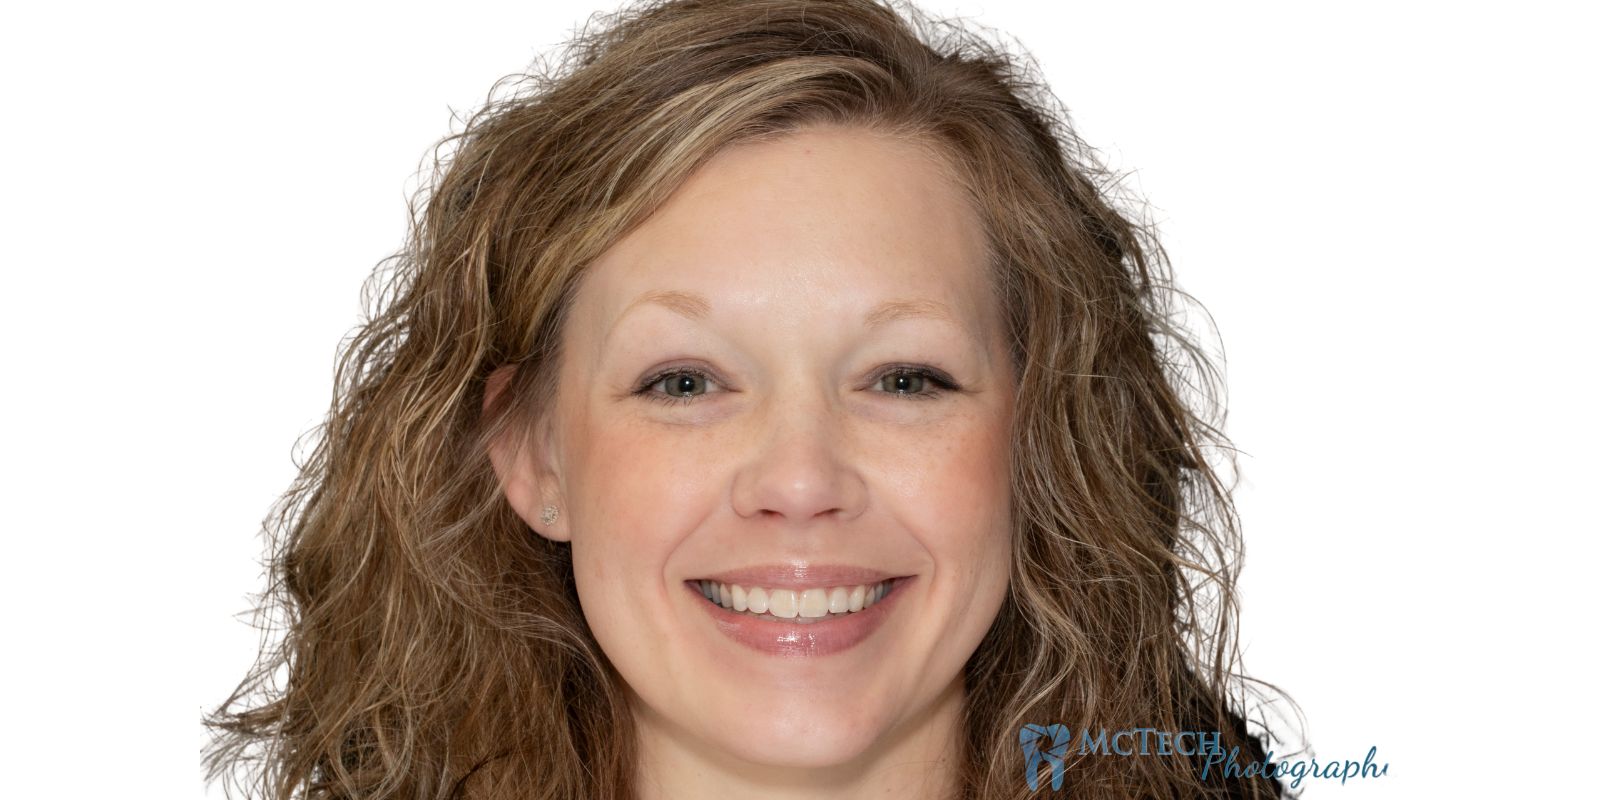
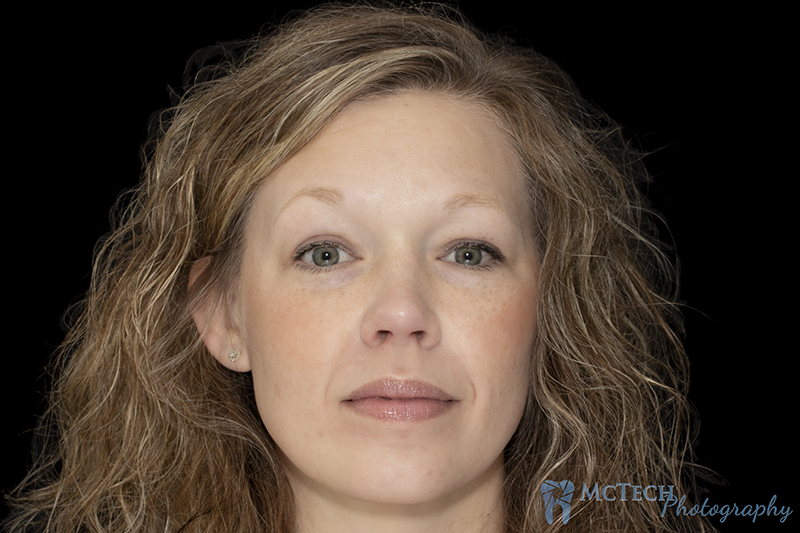
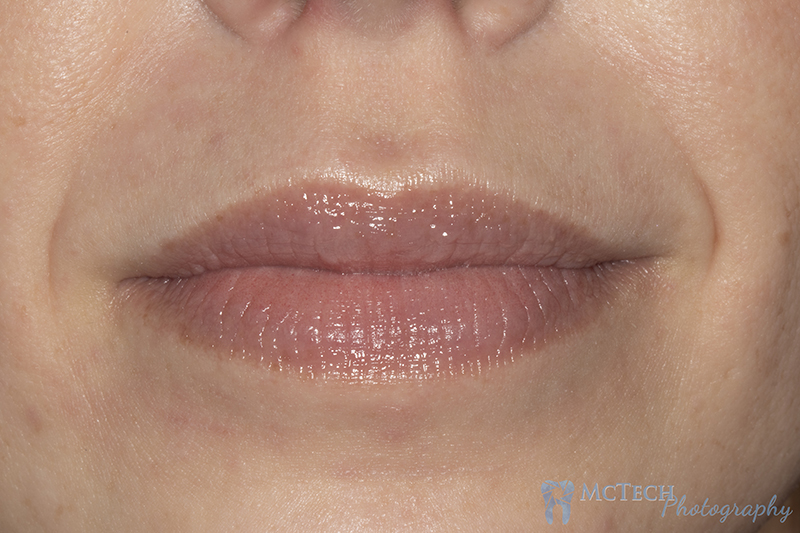
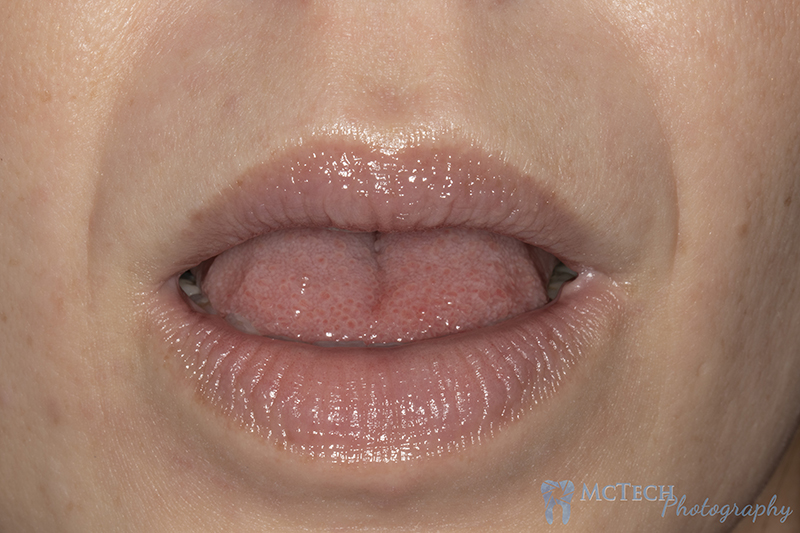
Portrait 3: Frontal View / a.Not Smiling, b.Mouth in Repose, c.Full Smile

MCTech Dental Laboratory

Portrait 4: 45° Right Profile / a.Not Smiling, b.Mouth in Repose, c.Full Smile

MCTech Dental Laboratory

Portrait 5: 90° Right Profile / a.Not Smiling, b.Mouth in Repose, c.Full Smile

MCTech Dental Laboratory

Smile Design Shots

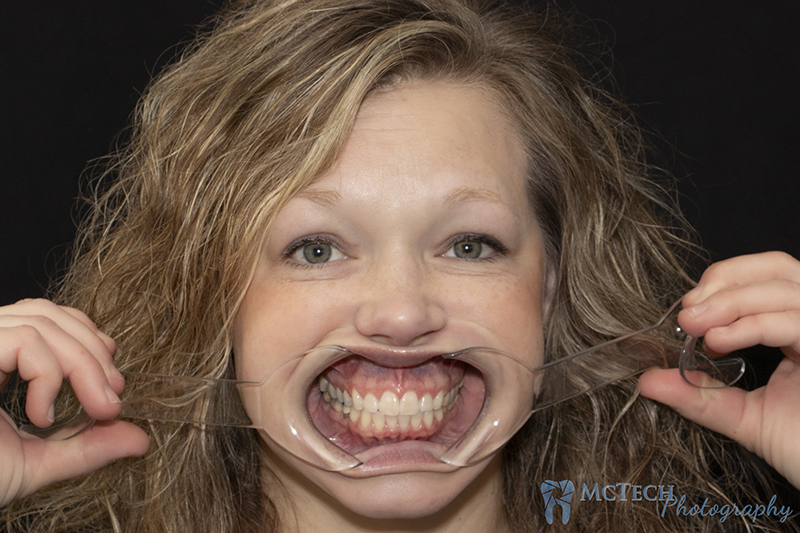
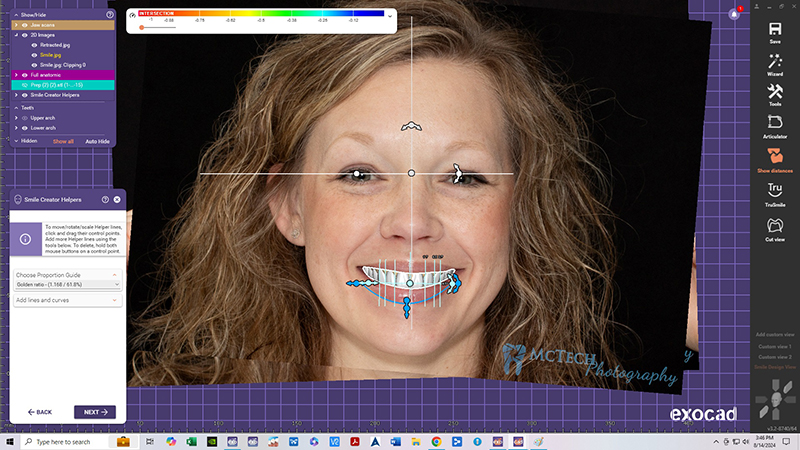
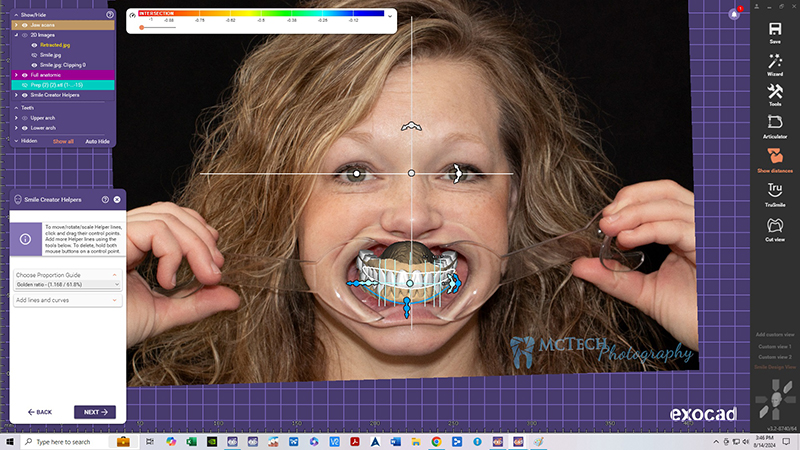
There are two shots in particular that allow us to communicate and collaborate utilizing our smile design CAD software in exocad. We import the images and superimpose first the original scans of the teeth and then the CAD designed wax up, over first the retracted photo then the smile shot. The software then has us draw the lip line and we can select the ratio of the teeth that best fits. All of the various curves and lines are available to us to freely manipulate and balance against the rest of the face. This assists in meeting goals of function and aesthetics for a case and and communicating our results and reasoning to rest of the restorative team.

Use the Same Equipment and settings used for Portrait shots but with two single sided retractors. Use a grey card and shoot in RAW if at all possible but high quality phone pictures may suffice

Technique and Instructions to the Patient

The photos taken for this purpose should be of high quality as possible. An important thing to accomplish between these photos is consistency. The two photos should betaken in quick succession, to eliminate as much difference in head tilt and camera angulation and distance as possible. Too much difference will render the photos unless for the purposes of the software. First, The camera should be fix on a tripod or surface. I recommend taking the retracted photo first. Have the patient hold two single sided retractors “pulling them toward the ears” and clenching their teeth together in Maximal Intercuspal Position (MIP). After taking this shot. Instruct them to quickly and without moving their head remove the retractors and smile broadly.

MCTech Dental Laboratory

Mouth & Teeth

Equipment Used for These Shots

  • Camera - Canon EOS 77D
  • ISO: 100 ; Aperture: f/22 ; Shutter Speed: 1/100 sec ; Format: Raw
  • Flash – Canon Macro Ring Lite MR-14EX – 1/8 .3
  • Macro Lens: EF 100mm USM
  • Raw Format ; Singlepoint AF ;
  • Single sided retractor, Self-Retracting Retractor, Black Contrastor, Occlusal Mirror & Buccal Mirror
  • Grey Card

Techniques Used for These Shots

  • Place a sterilized Grey Card against the teeth, when using mirrors, place it against the mirrors.
  • Keep teeth hydrated! Take breaks, do what it takes, but do not let the teeth dry out. Dry teeth have a completely different color and surface and texture details are lost, distorted, or exaggerated.
  • When retractors are used, keep them out of the shot as best you can.
  • When taking a smiling photo, document the maximum number of teeth and gingiva the patient normally displays when laughing or broadly smiling.
  • Do not compensate for a midline discrepancy.
  • The image should be taken directly in front of and level with the patient. Avoid inferior or superior angulation with anterior teeth particularly, as details of the buccal contours can suffer. If the glare reflecting on the tooth in the image is only on the incisal edges, the shot was taken from an inferior angle. If the light glare on the tooth in the image is near the gum line the shot was taken from a superior angle.
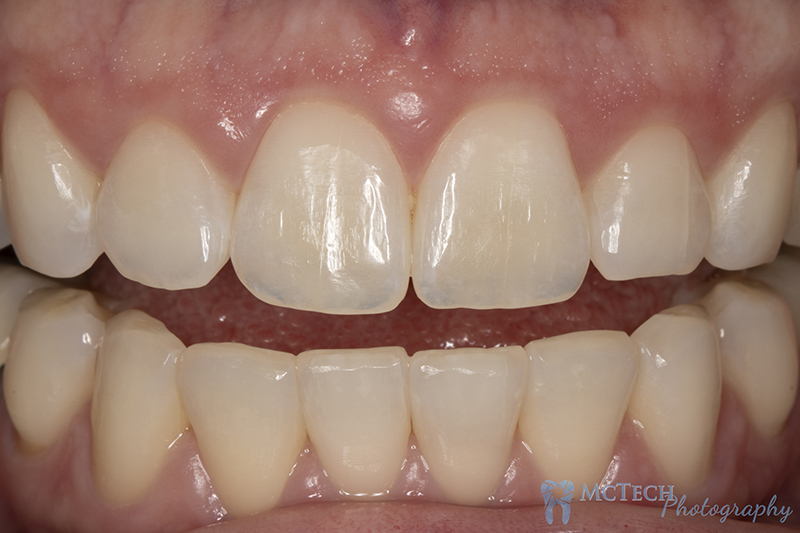
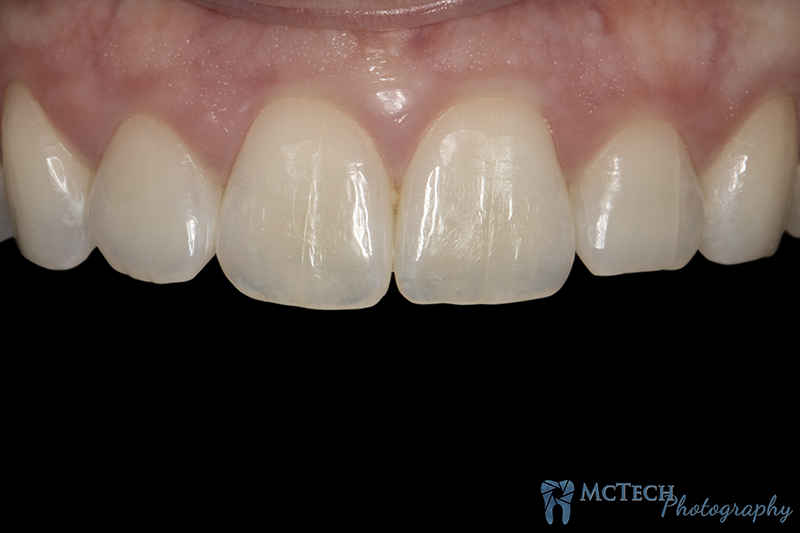
  • When capturing the aesthetic zone, bring front 6 into full frame. Within this zone, make sure the black contrastor takes up the entire background and eliminate the appearance of it’s edges. Eliminate the appearance of the retractors.
  • Warm the mirrors in a bowl of hot water to prevent fogging, if the patient is breathing through their nose and fogging persists, the mirrors are not warm enough. Instruct patient to breath through their nose

Instructions to the Patient

  • Instruct the patient to clean their teeth (brushing and flossing) and to avoid hard flossing or brushing that would inflame the tissue. Before every shot, eliminate debris and distractions such as surface sealants, excessive saliva, plaque, calculus, blood, food debris, makeup, glove powder, and lipstick on teeth.
  • When using mirrors, instruct patient to breath through their nose

INTRA ORAL SHOTS ARE TOUGH! Take breaks, work as a team, don’t rush, and soon, with practice, it will get easier.

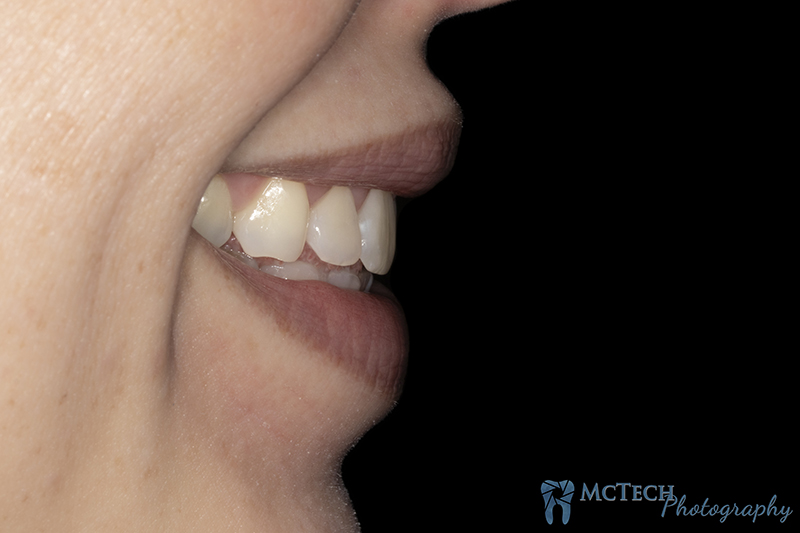
Mouth 1: 90° Left Profile / a.Not Smiling, b.Mouth in Repose, c.Full Smile

MCTech Dental Laboratory

Mouth 2: 45° Left Profile / a.Not Smiling, b.Mouth in Repose, c.Full Smile

MCTech Dental Laboratory

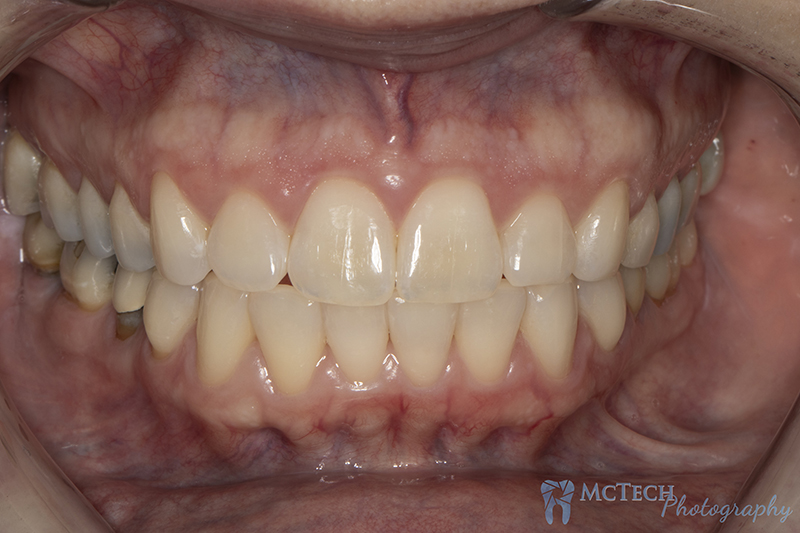
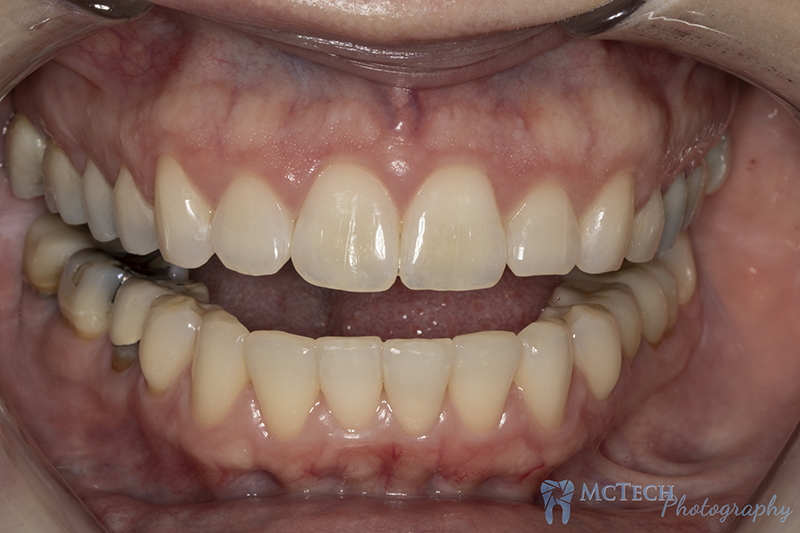
Mouth 3: Frontal View / a.Not Smiling, b.Mouth in Repose, c.Full Smile

MCTech Dental Laboratory

Mouth 4: 45° Right Profile / a.Not Smiling, b.Mouth in Repose, c.Full Smile

MCTech Dental Laboratory

Mouth 5: 90° Right Profile / a.Not Smiling, b.Mouth in Repose, c.Full Smile

MCTech Dental Laboratory

Teeth 1: Maxillary and Mandibular / a.MIP, b.Open Position

MCTech Dental Laboratory

Teeth 2: Maxillary Anterior / a.Open Position, b. Black Contrastor

MCTech Dental Laboratory

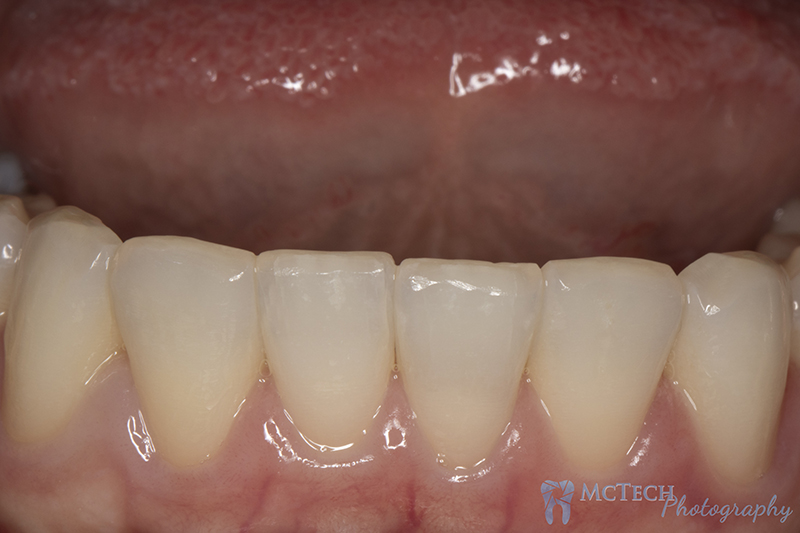
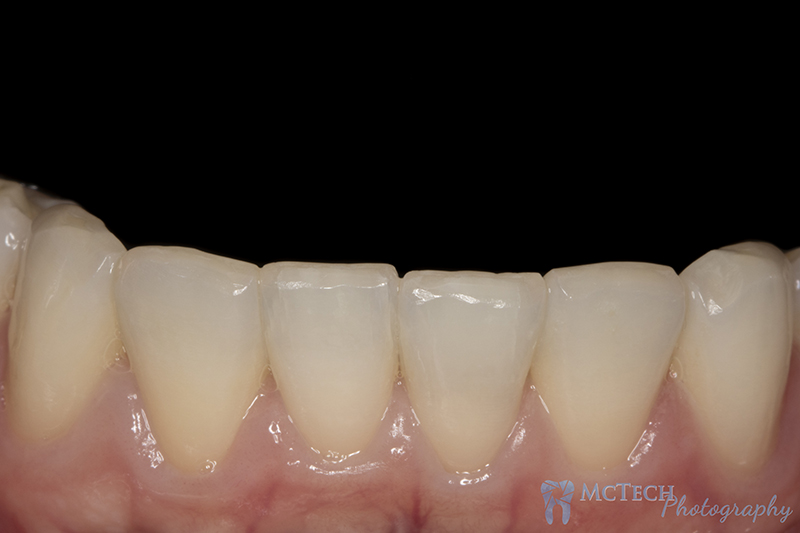
Teeth 3: Mandibular Anterior / a.Mouth Open, b.Black Contrastor

MCTech Dental Laboratory

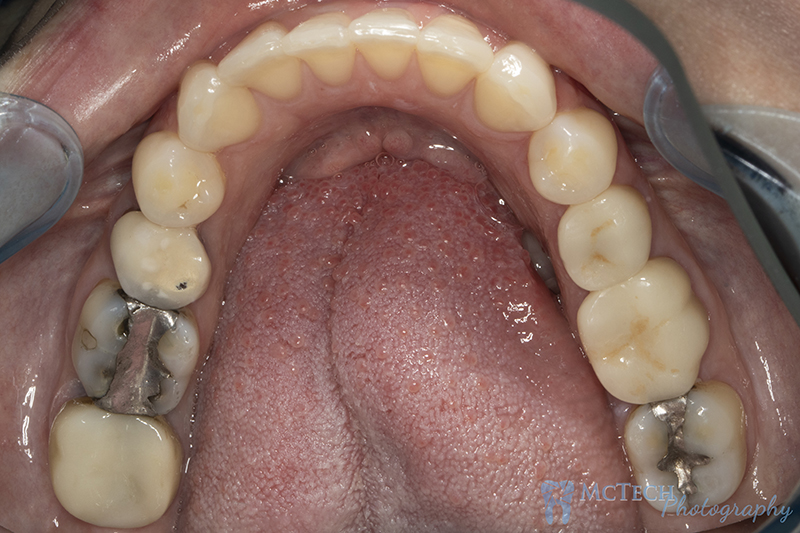
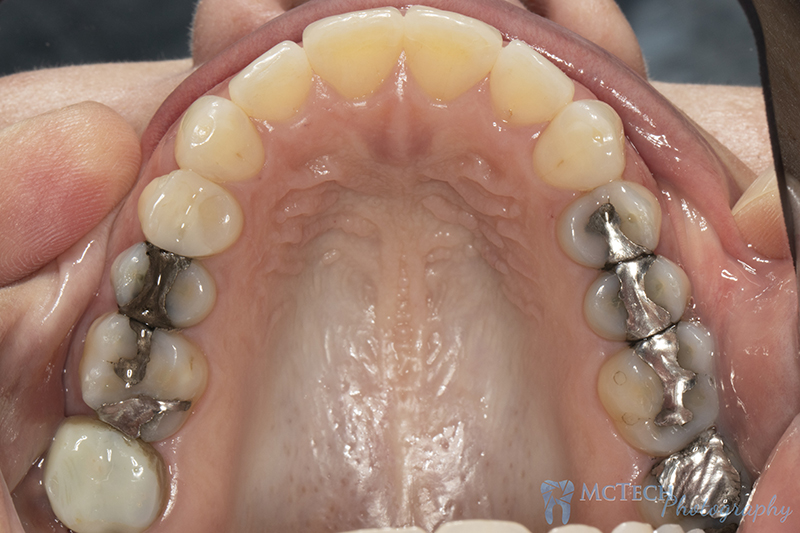
Teeth 4: Occlusal View / a.Maxillary Arch, b.Mandibular Arch

MCTech Dental Laboratory

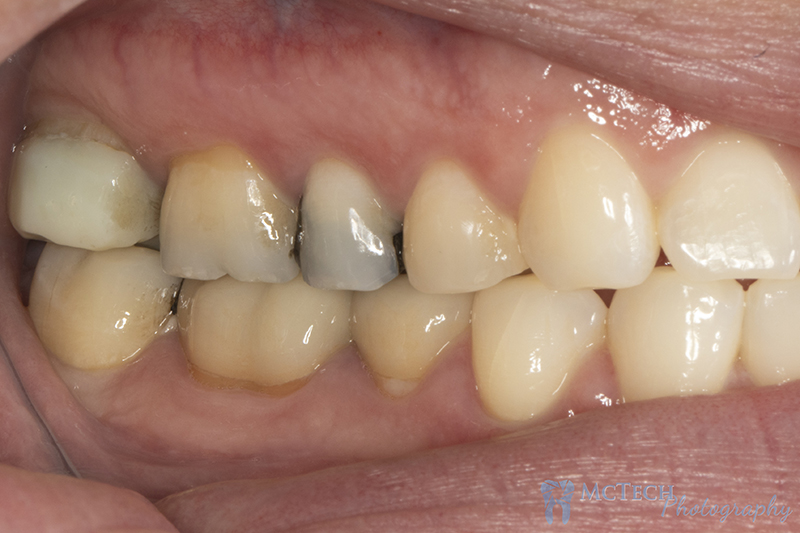
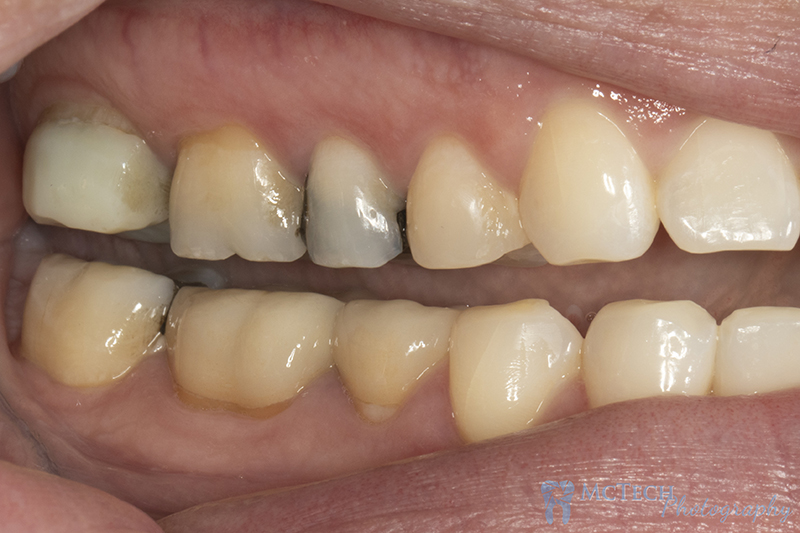
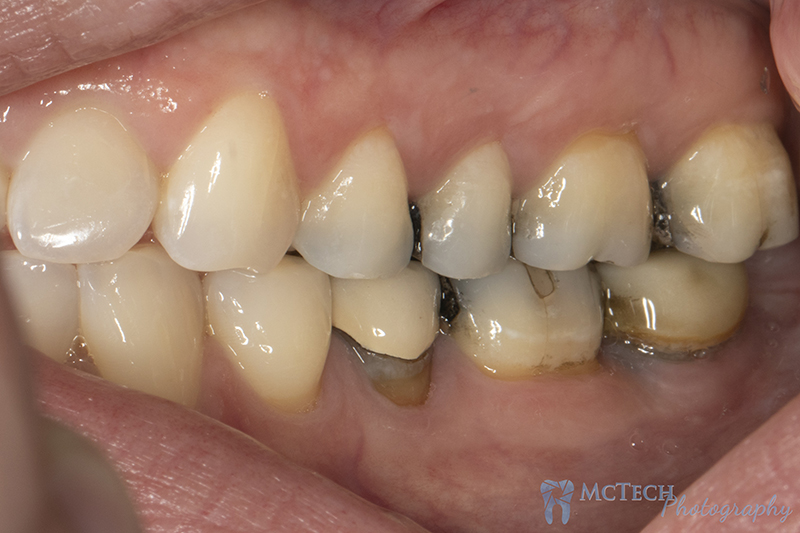
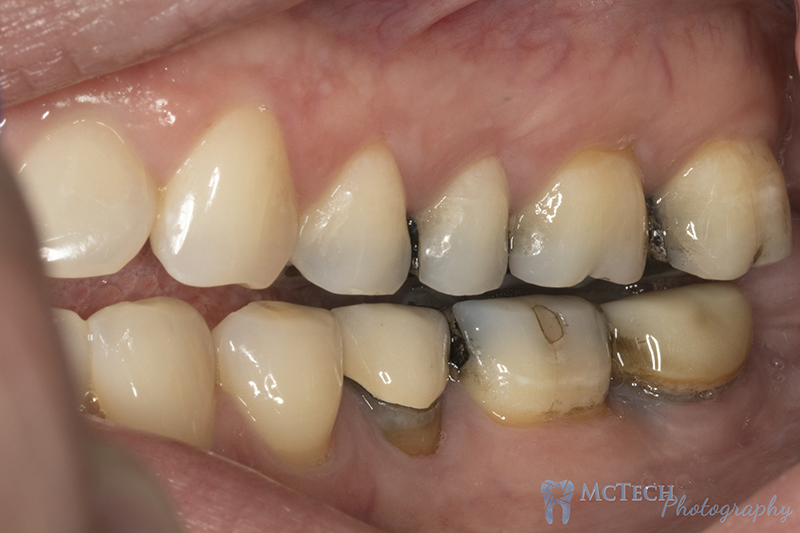
Teeth 5: Maxillary and Mandibular Right Lateral / a.MIP, b.Open Position

MCTech Dental Laboratory

Teeth 6: Maxillary and Mandibular Left Lateral / a.MIP, b.Open Position

MCTech Dental Laboratory

Shade Shots

Use the Same Equipment and settings used for mouth and teeth shots. This includes the use of a grey card and shooting in RAW if at all possible.

Techniques Used for These Shots

  • Keep teeth hydrated! Take breaks, do what it takes, but do not let the teeth dry out. Dry teeth have a completely different color and surface and texture details are lost, distorted, or exaggerated.
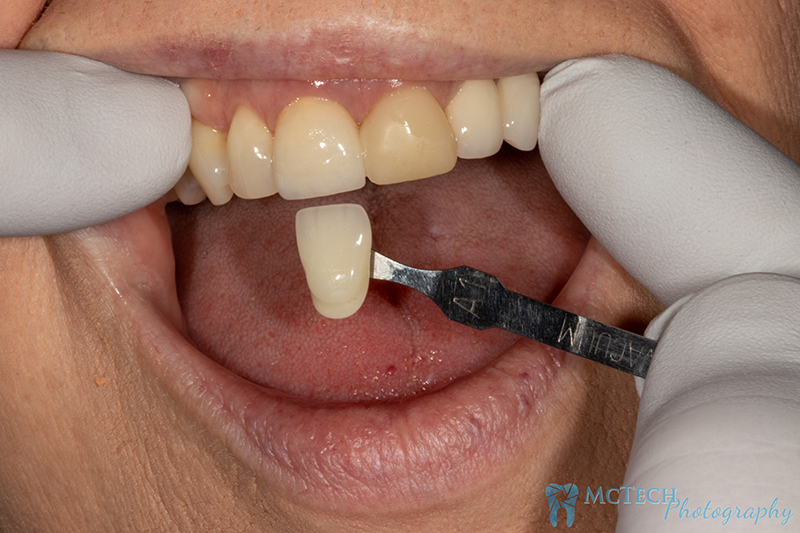
  • Pictures of shade tabs are for comparative use only. Always give the technician your opinion about the shade.
  • Capture the full mouth in the frame with every shot.
  • Ideally take shade photos with a reasonable time after cleaning appointment. We want to match the natural tooth, not the plaque. Allow for at least a day after a cleaning appointment before taking shade shots to allow tissue and enamel to recover and hydrate.
  • Instruct the patient to clean their teeth (brushing and flossing) and to avoid hard flossing or brushing that would inflame the tissue. Before every shot, eliminate debris and distractions such as excessive saliva, plaque, calculus, blood, food debris, makeup, glove powder, and lipstick on teeth ect.
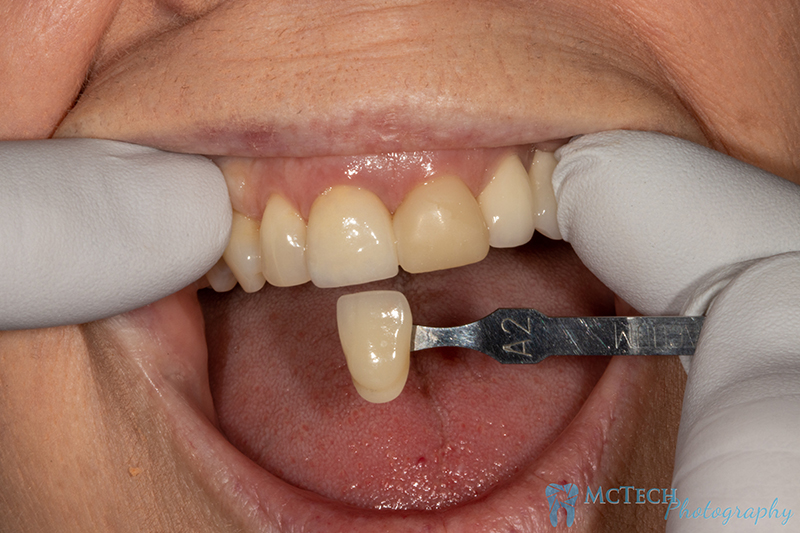
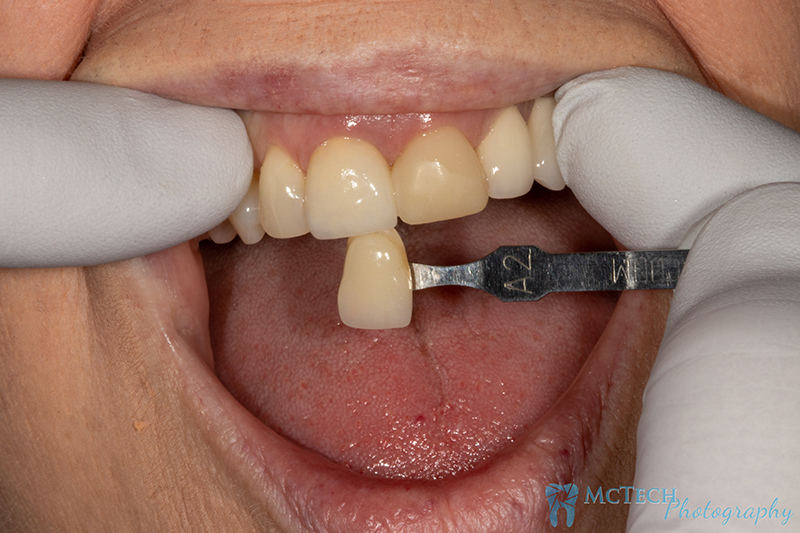
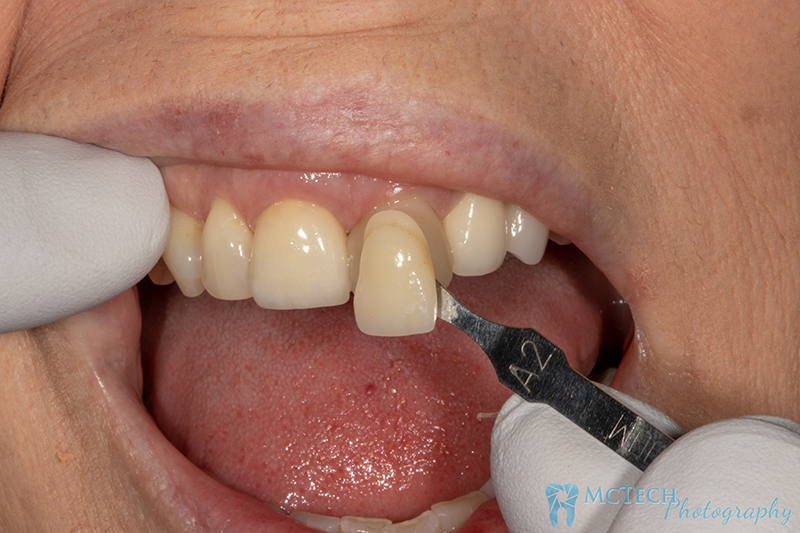
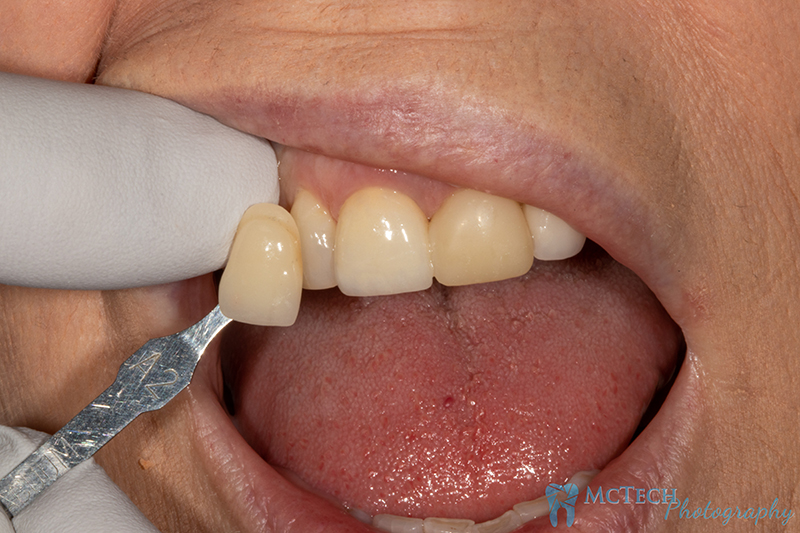
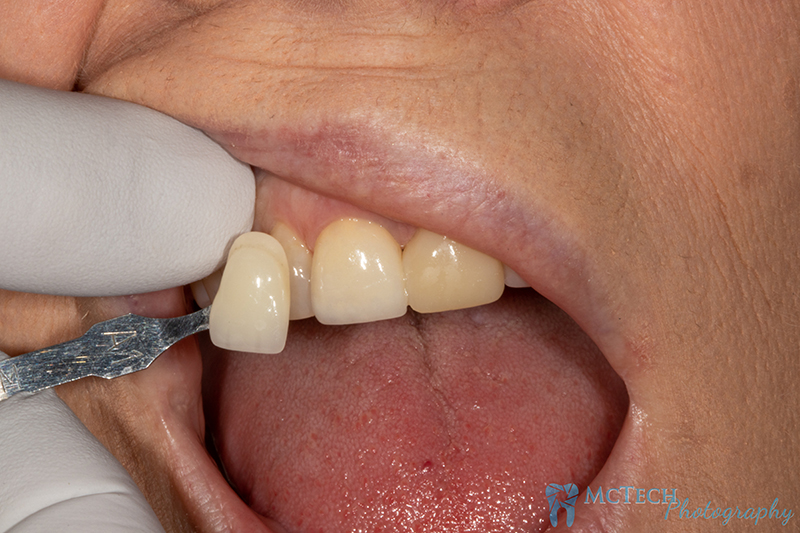
  • Retract the patients lips to reveal the entire tooth to be matched. Use retractors, have the patient hold them, or if you prefer, used gloved fingers.
  • Make sure label on shade tab is visible
  • For end-to-end shots, leave a small space between incisal edges
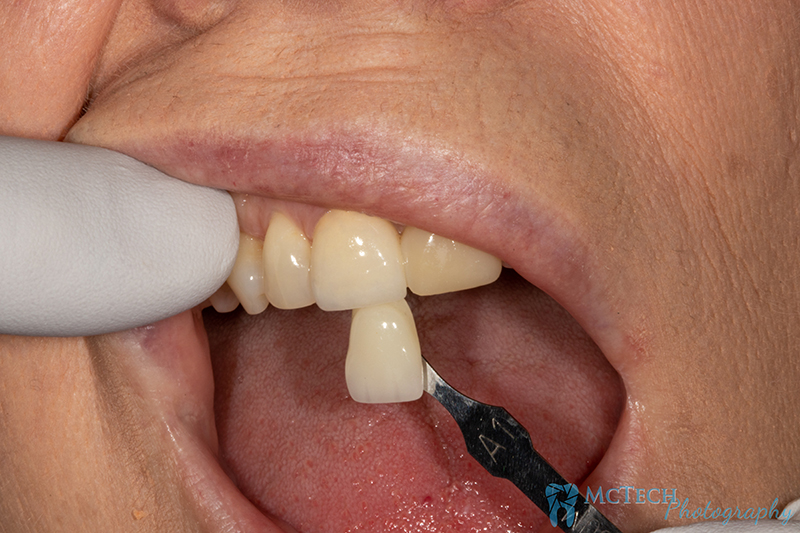
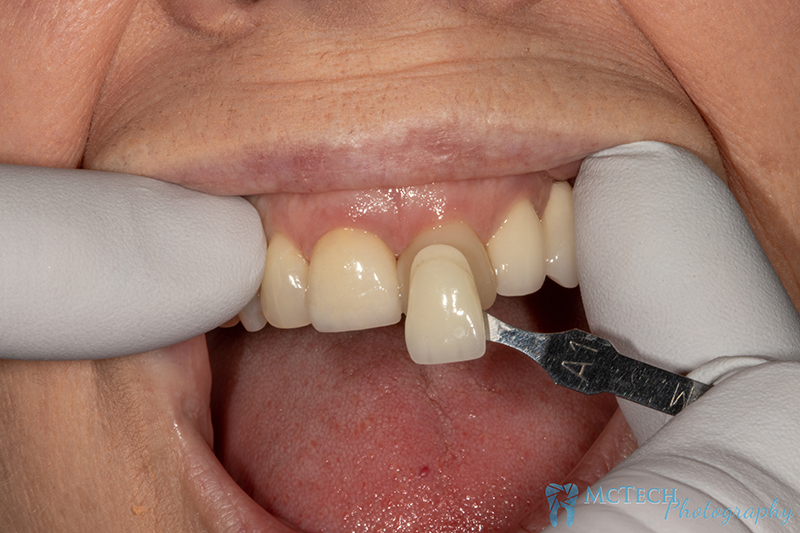
  • The Surface of the shade tab should be angled to mimic the angle of the tooth to be matched. Avoid angulation problems that will affect the appearance of the incisal plane.
  • Keep tab surface flush with surface of the tooth be matched, not the temporary.
  • Classic Vita shade tabs are acceptable, Vita 3d shade tabs are preferred, for gingiva shots we prefer Ivoclar. For instructions to the proper use of the 3D shade tab system, check out our resources page on our website or click here.
  • If you choose to use a shade tab that we do not carry, please send the tab with the case.
  • Use as many Shade Tabs as you feel necessary. There are 4 shots to capture for every shade tab, make sure they are taken in relation to the tooth to be matched, not the tooth to be replaced, or the temporary.
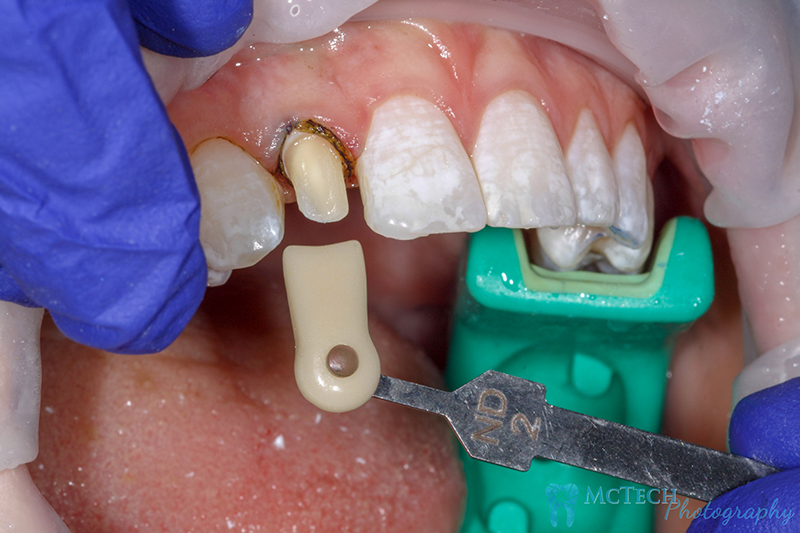
  • Stump Shades: For multiple preps, match each prep. If a stump has more than one color, match all.

Shade Shot 1: End to End

MCTech Dental Laboratory

Shade Shot 2: Seated Behind

MCTech Dental Laboratory

Shade Shot 3: Right Adjacent

MCTech Dental Laboratory

Shade Shot 4: Left Adjacent

MCTech Dental Laboratory

Shade Shot 5: Stump Shade
MCTech Dental Laboratory

Exposure

Light is to the art of photography what marble is to the sculpture. To be a truly great work, the human perception of things must be flexed and stretched to new and creative limits. Similar to the way a sculpture sees the subject within the stone to be revealed by the chiseling, The great and artistic photographer sees the world as a three dimensional canvas upon which light paints the reality we see.

If this sounds a bit intimidating I am happy to inform you that clinical photography requires no such artistic capacity. Though an understanding of your cameras settings are often best illustrated using artistic images and compositions. While learning the “why” to your exposure settings, you may become inspired.

MCTech Dental Laboratory

For simplicity, exposure means the amount of light. Excluding the intensity and color of a given light source, exposure is almost entirely a balance between three settings. Study the exposure triangle and compare the following recommendations and you will see that dental photography requires settings that let very little light into the camera. The high demand for close up, sharp, accurate and well focused images will necessitate a flash.

MCTech Dental Laboratory

Aperature

For all macro shots use Aperture f/22 | For all portrait shots use Aperture f/11

Aperture, or f-stop, controls the intensity of the light striking the camera sensor. Aperture literally means hole, the size of which is exactly what is being controlled. It creates the depth of field and can cause either close up or far away objects to come into sharp focus or become blurred. A higher Aperture creates a smaller hole and will cause more of the image to become sharply focused. However, this smaller hole lets less light into the camera and thus lowering overall exposure of the image. A lower aperture creates a larger hole allowing more light to strike the sensor while also narrowing the focal field. The effect is sharp clarity for objects that are taking up that focal field, while rendering the rest of the image a blur.

MCTech Dental Laboratory

For the purposes of clinical photography, blur is not welcome and therefor a high aperture is recommended for close shots of the mouth, while a lower aperture is recommended to allow more light for portrait shots. The lower aperture for portrait shots is to allow more light into the lense.

MCTech Dental Laboratory

Using low aperture like the photo on the left is an expressive and artistic way to replicate a human eye like perception. Perhaps focusing on the middle ground and not my son sends an almost negative message, A child ignored, The viewer unable to distinguish if he is smiling and what he is trying to show me. The higher Aperture on the right makes the image appear flat, but I can see he has proudly found a railroad Spike

Shuter Speed

For all shots use Shutter Speed 1/100

Shutter speed is expressed as a ratio of length of time light is exposed to the camera sensor per second, or more simply a fraction of a second. You will see it written as either 1/100 or just 100. A shorter or faster shutter speed will allow less light and information given from that light to be recorded in a single shot, essentially freezing a moment in sharp clarity. The effect is a decrease in overall exposure of the image as well as less blur from motion.

MCTech Dental Laboratory

A longer or slower shutter speed will allow more light and all information given from that light to be recorded in a single shot. This effect can not only increase overall exposure or brightness but also communicate movement in the form of blur or lines of motion. For artistic images trying to convey motion this is great but for the purposes of clinical photography any blur is only taking away from critical information. Therefore, a higher shutter speed is recommended.

MCTech Dental Laboratory

A slow shutter speed effect is so dramatic we can see two distinct facial expressions. Is this an artistic statemnet about duality or is it just a 6 year old who can’t hold still?

MCTech Dental Laboratory

A Fast shutter Speed freezes the subject and reveals sharp details that were completely unnoticable. Just take a closer look at my then 2 year olds face in this photo I took in 2019, notice anyhting?

ISO

For all shots use iso 100

ISO is easily understood as how sensitive the camera sensor is to light. This setting will dictate the graininess or “noise” present in an image. Even though a higher grain or noise does impart a sense of foreboding, chaos, and anger to a photo, this effect is better achieved in post. In almost every circumstance, one would as a rule reduce the amount of noise in an image as much as possible. In fact, when using the lowest ISO available, it is known as the base ISO.

So the biggest reason for a higher ISO would be for low light conditions. In clinical dental photography this is far from the environment. The subject is static and we have flashes to provide a controlled and powerfully direct light source. To get the sharpest image possible, a low ISO is used for all shots.

MCTech Dental Laboratory MCTech Dental Laboratory

Aspect Ratio

For all shots, 3:2 Aspect Ratio is recommended

I would recommend the 3:2 ratio. This is the recommendation with either full sensor or crop sensor cameras. My reasoning has context, and harkens back to pre digital photography and the 35mm film. Now, a full-frame 35mm sensor measures 36 mm x 24 mm. You can express this figure as a ratio: 36:24. Divide to lowest common denominator and….3:2.

MCTech Dental Laboratory

It is true other ratios are far more visually appealing, namely 4:3 and 16:9. a quick internet search will tell you these exist for the purposes of screens, monitors, and smart phones and even some forms of print. But the deeper reason is because implementation of compositions like the rule of thirds, rule of odds, symmetry and leading lines play well to these ratios. I personally think this is a very interesting and deep topic. Even before I studied a lick of composition I recognized that croping my phone pictures was an art in it’self. At the end of the day, all other ratios are simply that, cropping either vertical or horizontal pixels out of the frame. At the risk of ruffling artistic feathers I’ll say this can just as easily be accomplished in Post. To get the most from every shot, use 3:2.

MCTech Dental Laboratory

Here is an example of a photo applying with a 16:9 aspect ratio and composed using the rule of thirds. Beckys eyes are 1/3 from the top edge and the spot directly in between her eyes is set 1/3 of the way from the left edge.

Camera

While it is true that mirrorless cameras in smaller formats such as on your phone are well on their way to doing much of what a DSLR camera can do, that is not the type of camera that I have the most experience taking professional grade photos with. For the purposes of this guide the assumption here is that you have a DSLR camera. As to the make and model of the camera, that matters far less than understanding the capabilities you your equipment. I will be consistently using my cannon 77D as an example but Nikon and most other DSLR brands have an equivalent capability to everything described here.

MCTech Dental Laboratory

Lense

I will state that I use an unconventional setup in that I use my macro lense for portrait. Macro lenses actually take great portraits and using one lense for both close up and head shots means I’m almost never removing my lense from the body and thus I eliminates the risk of dirt and debris from getting into the more sensitive parts of the camera and lense.

The two huge draw backs is that I must have an abundance of space in which to take portraits. I stand almost 7 ft away from my subject and as you can imagine the output of my flash even at full blast is barely adequate.

A stabilizing feature is not necessary but helpful.

MCTech Dental Laboratory

Flashes

Photography is all about light. Because of this, the options for flashes and their accessories are nearly limitless but I will recommend and discuss only the few I have experience with. The first recommendation is for a macro flash. The two options are, in general terms, a ring light or a dual flash and my recommendation is the ring light.

MCTech Dental Laboratory

I prefer the ring light over the dual light for close-up extra and intra oral photography because even though the dual light can capture nuanced details of surface texture on the facial portion of anterior teeth, it more often leads to inconsistent and varied results that create more problems. Especially when it comes to the before and afters. The weight of the camera and the clinical environment that can often be cramped are other considerations for recommending a ring flash. Ring flashes are also much simpler to use in conjunction with a grey card, as I will explain in more detail in the grey card portion of this walkthrough.

The other recommendation is for a portrait flash and a few key accessories. The flash I use is the 600EX-RT. I would recommend a flash with this level of output as a minimum. For the purposes of this walkthrough I am assuming not every office has the space or budget for a full blown photo studio. If you do, by all means buy the full wall back drop with two or three studio flashes with soft boxes and umbrellas. All this equipment really is fun to use and can make a noticeable difference. But I can achieve very professional results with a single horse shoe flash mounted directly to my camera, a fog style diffuser. I always use a tripod and angle the flash 45 degrees. If for some reason l cannot achieve a high enough exposure, I take the cap off the fog diffuser.

Background: White & Black

It is important to get a background that is uniform. White backgrounds are often preferred in dental photography due to their neutral and calming affect. AACD standards also require a neutral white background. Personally I prefer a black background because the contrast is appealing to me and because black is far easier to mask with in post. in order to creat lighting that won’t produce shadows directly behind the patient I would need more light bounces and soft boxes. I find the black background more suited to my environment for now. What is reccomended is that when purchasing a background, have both options available.

MCTech Dental Laboratory

Photographic Reflector

A Photographic Reflector is a reflective surface that when held at an angle in front of the patient bounces light from the flash up to the patients face. The effect is to eliminate distracting shadows on the face and offer a more visually pleasing lighting situation. The patient should hold the reflector in the horizontal position at about chest level.

MCTech Dental Laboratory

Intra Oral Equipment

At a minimum, the list on the left is what you will need to take the intra oral shots that will be described later in this guide. This list is by no means comprehensive, it’s just what I use and have found works well for me.

Of special note here is the participation of the patient in each of these shots. To involve or to not involve the patient is a case by case decision having much to do with the patients comfort and ability to follow instructions. What is important to note is the use of this equipment is a team effort and requires practice, practice and more practice. I encourage you and your team to experiment with having the patient lay down in a dental chair, if that doesn’t seem to produce the desired results try having the patient sit up in a chair or even stand. Try holding the camera, try using a tripod. To be honest I sometimes do things completely different from office to office depending on who I am working with. In the lab it very much depends on how much participation I can get from the patient.

MCTech Dental Laboratory

Shooting Mode

For all shots Manual is required.

The purpose of the various priority modes is to share some of the responsibility of obtaining correct exposure with the camera’s computer and sensors. In other words, you choose one of the big three settings you’d like to control and the rest are automated. Often with dental photography guides you are told that you may use aperture priority mode. This however will make it impossible to calibrate the photos in post. You must control for aperture, shutter speed and ISO. The good news is this simplifies things, You only have to learn Manual.

MCTech Dental Laboratory

RAW Format

For all shots RAW format is recommended.

RAW images are uncompressed. What this means in comparison to other formats such as JPEG is there are no decisions of quality to be made, Raw is the highest quality image the camera can create. RAW can be thought of as a digital negative. The downside to the Raw format is tied to this strength. The file size is typically so large and hardware-specific that Raw files must be put through post processing software such as adobe lightroom to render them into smaller and more useable formats. However, if one is to utilize grey cards to calibrate images for color and exposure, especially images taken weeks or months apart for before and after shots, then a post processing software like lightroom is a necessity anyway. I know from experience that lightroom will not allow this function with JPG’s. Shooting in raw may neccesitate the learning of another software, but it also vastly simplifies the actual shooting process as it illiminates camera setting options such as white balance, styles and brightness that can make your camera feel like a rubics cube.

Auto Focus & Metering

Single point Auto Focus is recommended. Spot metering is needed for using a grey card.

Single point auto focus is recommended. Spot metering puts a circle in the middle of the frame. This is needed to calibrate exposure when shooting with a grey card, essentially setting your distance.

MCTech Dental Laboratory

Calibrating color and exposure with a Grey Card

Every day, approximately one hour after sunrise and one hour before sunset the sun is at a lower angle in the sky. At this angle, the light passes through more atmosphere, making it redder and softer, creating longer shadows, and overall a flattering and dramatic lighting situation. This phenomenon is known widely to photographers and cinimatographers as “Golden hour”.

MCTech Dental Laboratory

The two images above were taken on August 24th 2023. As you can see, my son and I were fishing and on that evening, sunset was 8:09 PM. The photo on the left was taken at 6:52 PM, this is just before golden hour though you can see the shadows are getting longer. The photo on the right was taken at 7:31 PM, right in the middle of golden hour. Full disclosure, these photos were taken with an iphone, but that actually strengthens the point made here. Even with all the computing power and exposure automation available, the difference in light color is inescapable.

This is because color does not exist as an intrinsic value of an object, it is not a property of matter. The perception of color most objectively exists as a reflection of the wavelengths of light available and remaining after reflecting light upon an object. Now, there are intrinsic properties of matter that act upon the light given, such as the arrangements of atoms, proton, neutrons and electrons, that produce the method by which various wavelengths of light, or color, is absorbed and refracted by the object.

That is to say, the grass is not green, it has properties that when full spectrum daylight is introduced a green colored light is reflected back to us. But what if the light introduced has no green light? In that case, the grass will no longer be green. Just as my sons skin is no more red than it was 30 minutes from in the earlier photo.

Put simply, color is in the light.

MCTech Dental Laboratory

Without a grey card

MCTech Dental Laboratory

With a grey card

Applying this concept to dental photography is as easy as looking up your average before and after photo. Look at the photos on the left, even though the before and after shots were both taken in the same room with the same camera with all the same settings and the same flash and distance, the skin tone and yes the teeth are completely different when it comes to color. Even with a flash, light pollution from ambient sources like a window or fixture or even dying but not quite dead batteries in the flash all effect the color of light. Just as with golden hour, the light from the sun is different at different times of the day, that is just one of many variable that effect the color of natural light. The light from the sun in winter with snow is a different color than in the dead of summer.

Without a doubt using a grey card when shooting with a DSLR camera is the most sure-fire way to get excellent before and after shots with consistent and acuate tone and color and exposure. This is great for showcasing a case for patient education or marketing. A grey Card is also the most sure-fire way to capture accurate representation of tooth color and value for shade tab comparison. Having used a grey card since 2018 for all our custom shades, case, and marketing photography I can confidently say that becoming proficient with a grey card was one of the first great elevations of my skills as a dental photographer.
Meaningful before and after photos that are to objectively true to life for comparative and evaluative purposes are a result of controlling for certain key factors and then using a grey card to calibrate and correct for any discrepancy in exposure and light color. While it is possible to use a grey card for every shot you take and simply crop it out in post, another way is to take an initial shot with the settings to your camera and flash set and unchanged, along with your distance. The most important things to learn and remember when shooting with a grey card using this method, is to control for the following factors:

  1. Always shoot in RAW. Any other format will not allow for color and exposure calibration.
  2. Any Change to camera or flash settings, ie. aperture (f-stop) ISO and shutter speed requires another grey card shot to calibrate correctly
  3. Any Change to The power or color of the light source requires another grey card shot to calibrate correctly
  4. Any Change to The distance from the subject to the camera lense or light source (flash) requires another grey card shot to calibrate correctly

Factor One: Shooting in Raw

Controlling for factor one is easy. The virtues of shooting in RAW have already been extolled in the settings portion of this walkthrough. The pictures above walk you through how to do so in my camera. Though even among other Cannons this can vary, the general idea is always the same. Consult your owner’s manual for step-by-step instructions for your make and model. Once set however, and especially if you switch back and forth between jpg or have multiple users for one camera, be sure to check that Raw is selected before using your grey card.

MCTech Dental Laboratory

Factor Two: Set the Settings

As stated before, when a grey card is used any change to the light that enters the lense from that shot forward will nullify the ability to calibrate further photos and another shot with a grey card must be captured. Shoot in Manual and follow the recommended setting and this is very strait forward

Factor Three: Set the Flash Settings and Use Fresh Batteries Every Shoot

Just like with the camera settings, once the grey card shot has been taken you cannot change any flash settings. Make sure you are on M for manual, then meter down the flash to just above 1/4. For Portrait Shots go full blast to 1/1.

One thing that you’ll notice as you spend time post processing your photos is that even with settings set, somehow your shots are not rendering consistent exposure. This is sometimes because the output from the flash is very sensitive to the output from your batteries. While flashes are all claiming they have functions that eliminate this variable, in my experience a noticeable decline in exposure will result as the batteries in your flash drain with each shot. Here is a useful technique that not only ensures you are shooting with the most consistent battery fed light possible, but also saves you a ton on batteries. Just buy two sets of rechargeable batteries, each a different brand, and before every shoot replace with a fresh set. The purpose of the two different brands is to keep the two sets differentiated. This is a nice way to get consistent results from your flash. It’s also economical. You may here to never use rechargeable batteries but I find this technique has far better results as long as you keep them fresh

MCTech Dental Laboratory

Factor Four: Toggle Autofocus to Set Your Distance

The last factor to control after the grey card shot is taken is to maintain distances. Not only must you maintain the same distance from the camera lense to the subject, but you must also maintain the same distances and angles of the light source(s). The good news is if you followed my recommendation for a ring flash you’ve already controlled for one of those. With the portrait lense and a dual flash, do not change the angle of the flashes from that used for the grey card shot.

To control for the distance of the lense to the subject we have the benefit of this handy grey card, called white_balance grey reference card from Emulation S.Hein in Germany. What this company provides is worthy of another blog and walkthrough in it’self, for now lets have a look at what this does for us. In the center of the card you will notice an L, a, b, value of 79, 0, and 0 respectively. This is what is known as middle grey. To learn about the extent of what L,a,b, does for shade in dentistry check out our resources on our website and find “The Determination of the Tooth colors” download or click here. For now just know that we have a known L value of 79 that will allow us to calibrate for exposure in post. If your card does not have a know value for this that is fine, all grey cards should have a a,b, value of zero. This means it is still true grey and reflects the entire spectrum of light evenly, absorbing no one color more than another.
To the left side of the card you will notice some circles, those will set our distance. On the side of your lense make sure the Auto Focus switch is set to AF.
Next, have an assistant hold the sanitized grey card up to the patients’ incisal edge of 8 & 9. Then using the screen and not the viewfinder, line up the circle on the screen with the circle on the grey card and take the shot. If you are using a greycard without this circle, simply be sure the entire mouth, teeth and lips and all are well within the frame.

MCTech Dental Laboratory

Toggle the Auto focus switch on the barrel of the lense back to Manual Focus (MF)

MCTech Dental Laboratory

As you will notice the green box indicating auto focus is active is now gone.

And thats it!, your distance is set. What is very important to remember at this point is that you can no longer focus in or out, either automatically by lightly pressing the shutter , nor should you turn the barrel of the lense to manually focus. If you turn the barrel even by mistake you must take a new grey card shot and start your series over. If you find that the image is out of focus, that is because you have changed your distance, either you have gotten closer of further away from your subject. Rather than focusing your lense, correct your distance. This is useful for subjects like patients, who tend to stay less than perfectly still throughout a photoshoot.

Submitting your Photos

If you are a client of ours and you are shooting with a grey card we would prefer to receive the Raw images and process them ourselves. This is for several reasons but mostly it is simply a courtesy and a reward for following our recommended protocol. Please be open to feedback, if we cannot calibrate the photos for any reason, or we managed but the results are less than adequate, we will send you an email explaining what went wrong and how we can do better.

I want to reiterate that I am at your disposal and will offer free instruction to any doctor or staff member who has been sending us work if they come to my lab and schedule a time.

The best way for you to send me the RAW images is through a drop box link. Contact us and we will set you up. Please avoid sending us your USB or SD cards as we will not even attempt to return them, assuming instead you have gifted us hardware. We will upload a copy of the processed photos onto into the dropbox for your records though we reserve the right to delete them from DropBox.