Collaborating Through Dental Photography: Part 3: Settings
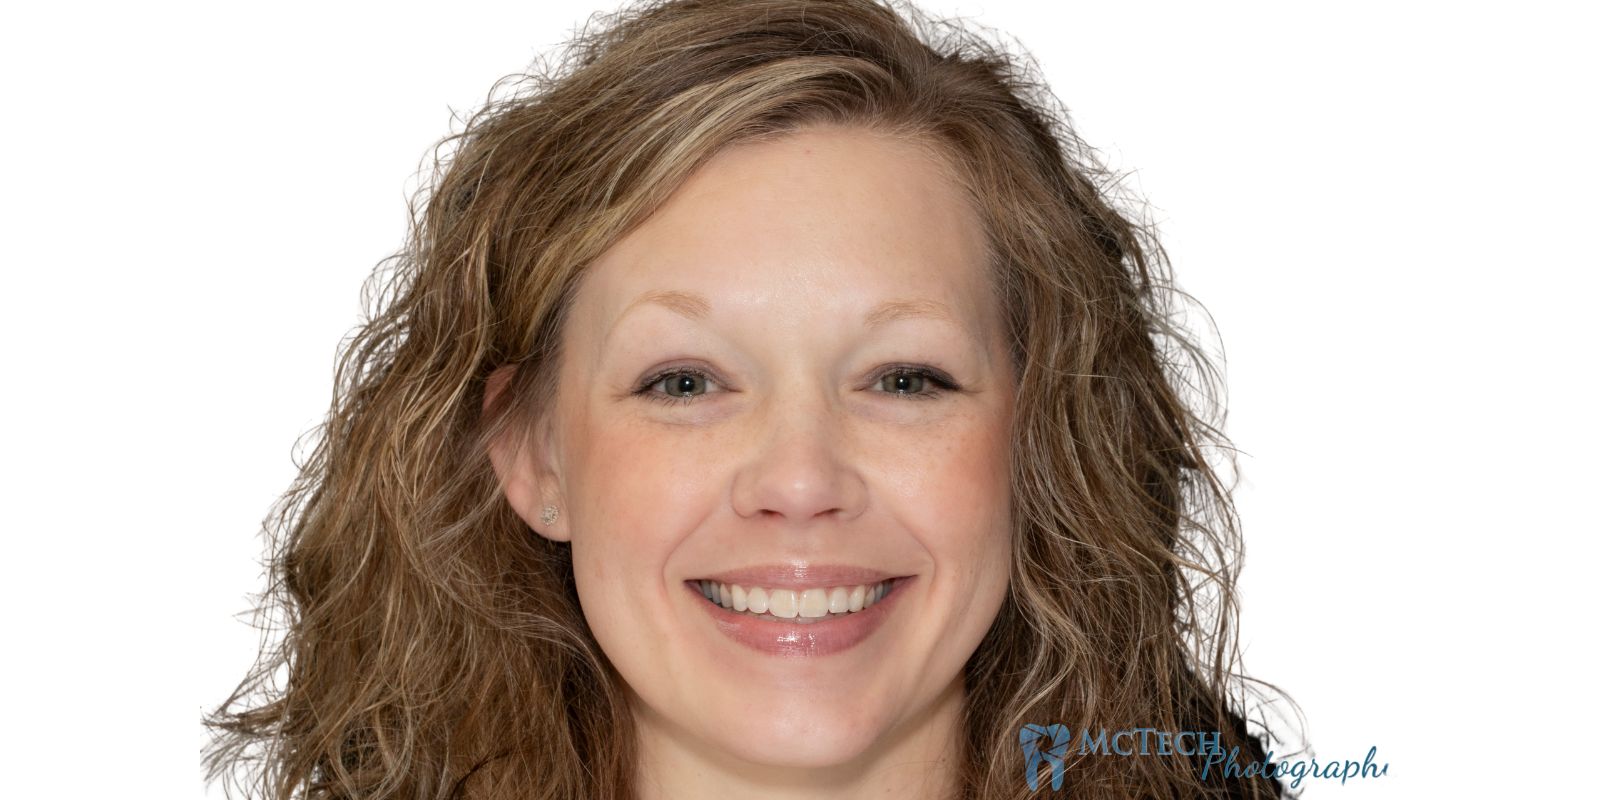
Special Thank you to Becky Cotant of Cotant Family Dentistry for her patience and grace in agreeing to model for this walkthrough.
Photography is a powerful tool to help overcome the problematic nature of restorative dentistry. To facilitate it’s use, I made it one of my mission to master this skill when I first arrived at McTech from college. Years later and I have authored this entire walkthrough and taken almost all photos myself. If you are a restorative team member of ours, such as a doctor, assistant, or other staff member, I am at your disposal to answer any questions you may have. If you would like to partner together on documenting a case please contact me, I am very interested!
The following will show you how I take the professional grade photography that is suitable for our purposes as a lab. Part of the goal of this walkthrough is to inform about basic photography fundamentals, and to lay the groundwork for a pursuit of composition. These photos require team effort, dedicated photography equipment, and yes there is a learning curve that requires practice to over overcome.
IMPORTANT!! This guide is not intended to be an all encompassing breakdown of dental photography. This is foremost a guide to how you can take the same kind of photos I do. The plan is to build from here as I learn more and more. What I’ve published here so far is just the basics. Do not let the complexity of this guide deter you from sending us or any other lab less than perfect photos. So… with that out of the way….
Exposure
Light is to the art of photography what marble is to the sculpture. To be a truly great work, the human perception of things must be flexed and stretched to new and creative limits. Similar to the way a sculpter sees the subject within the stone to be revealed by the chiseling, The great and artistic photographer sees the world as a three dimensional canvas upon which light paints the reality we see.
If this sounds a bit intimidating I am happy to inform you that clinical photography requires no such artistic capacity. Though an understanding of your camera’s settings are often best illustrated using artistic images and compositions. While learning the “why” to your exposure settings, you may become inspired.
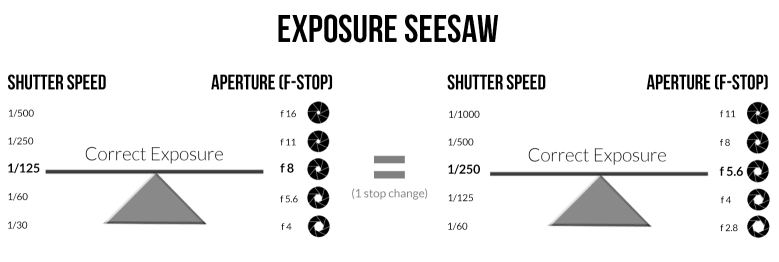
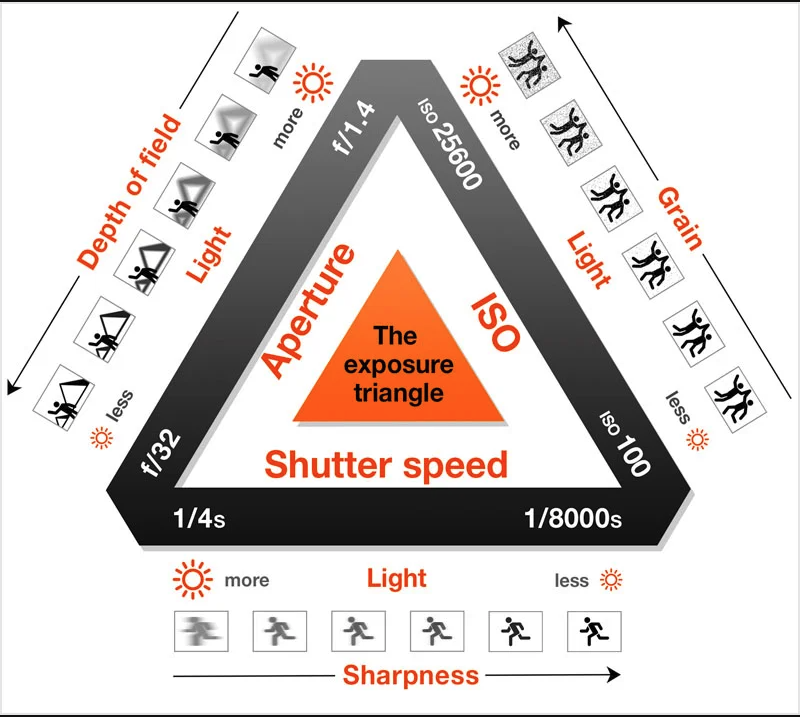 For simplicity, exposure means the amount of light. Excluding the intensity and color of a given light source, exposure is almost entirely a balance between three settings. Study the exposure triangle and compare the following recommendations and you will see that dental photography requires settings that allow very little light into the camera. The high demand for close up, sharp, accurate and well focused images will necessitate a flash.
Aperature
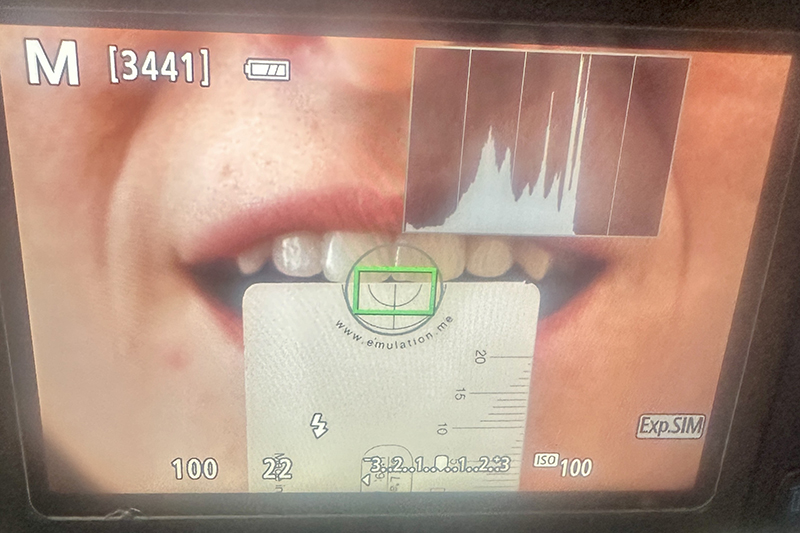
For all macro shots use Aperture f/22. For all portrait shots use Aperture f/11.
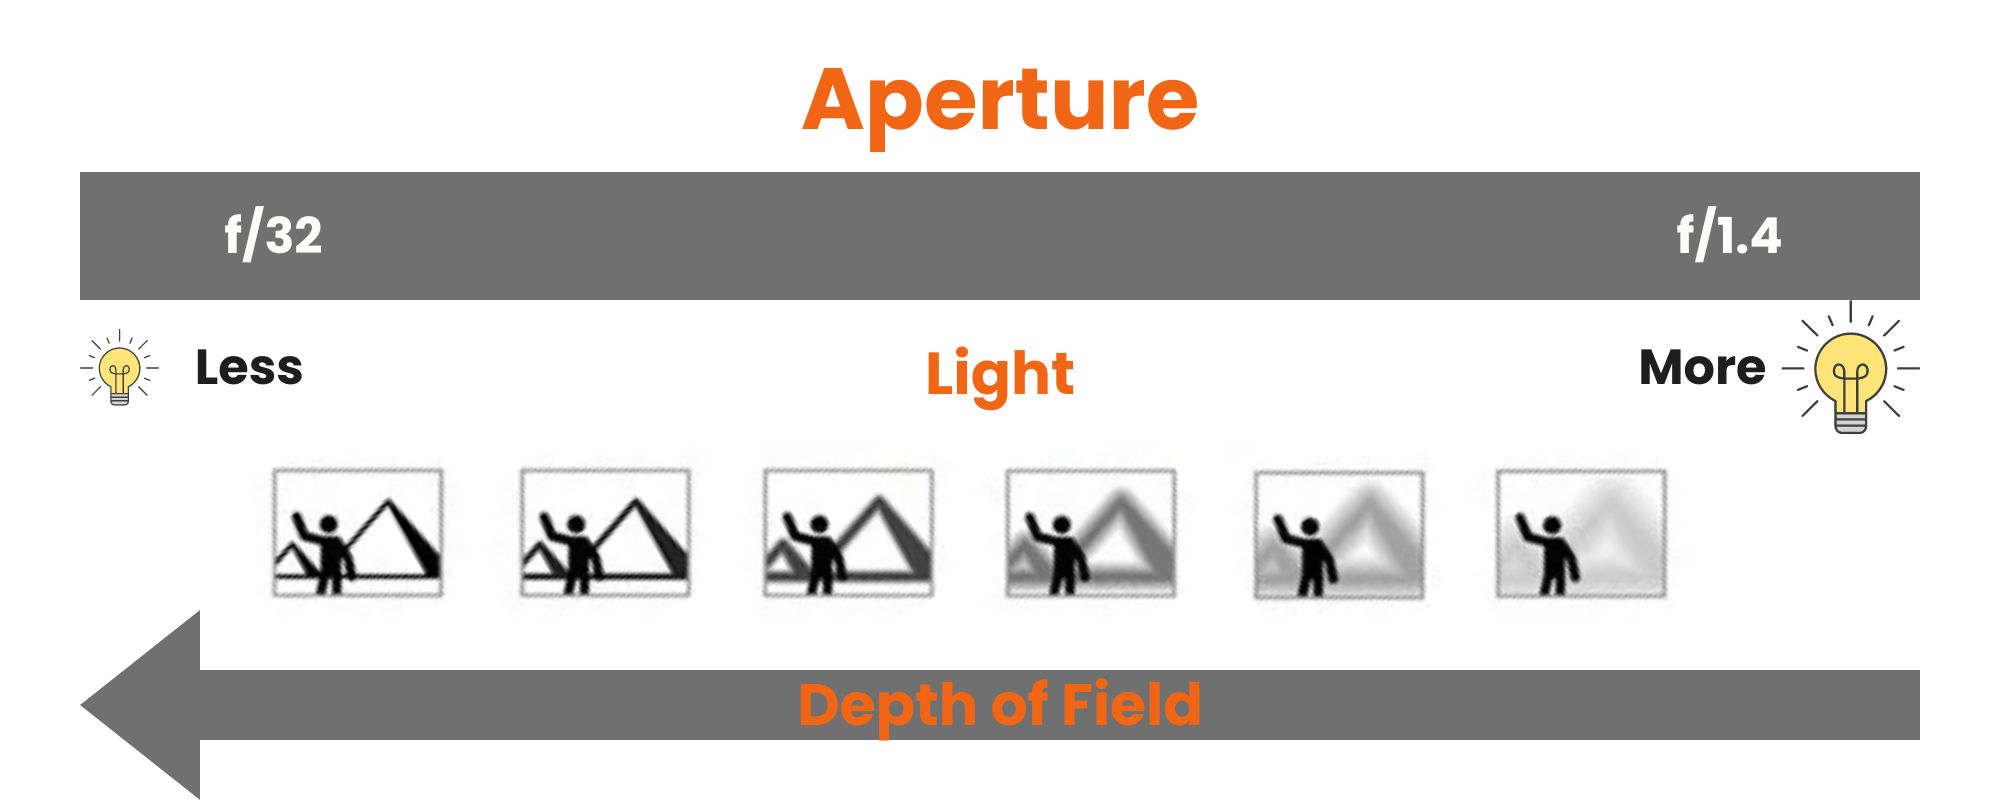
Aperture, or f-stop, controls the intensity of the light striking the camera sensor. Aperture literally means hole, the size of which is exactly what is being controlled. It creates the depth of field and can cause either close up or far away objects to come into sharp focus or become blurred. A higher Aperture creates a smaller hole and will cause more of the image to become sharply focused. However, this smaller hole lets less light into the camera and thus lowering overall exposure of the image. A lower aperture creates a larger hole allowing more light to strike the sensor while also narrowing the focal field. The effect is sharp clarity for objects that are taking up that focal field, while rendering the rest of the image a blur.
For the purposes of clinical photography, blur is not welcome and therefor a high aperture is recommended for close shots of the mouth. A lower aperture is recommended to allow more light for portrait shots. The lower aperture for portrait shots is to allow more light into the lens.
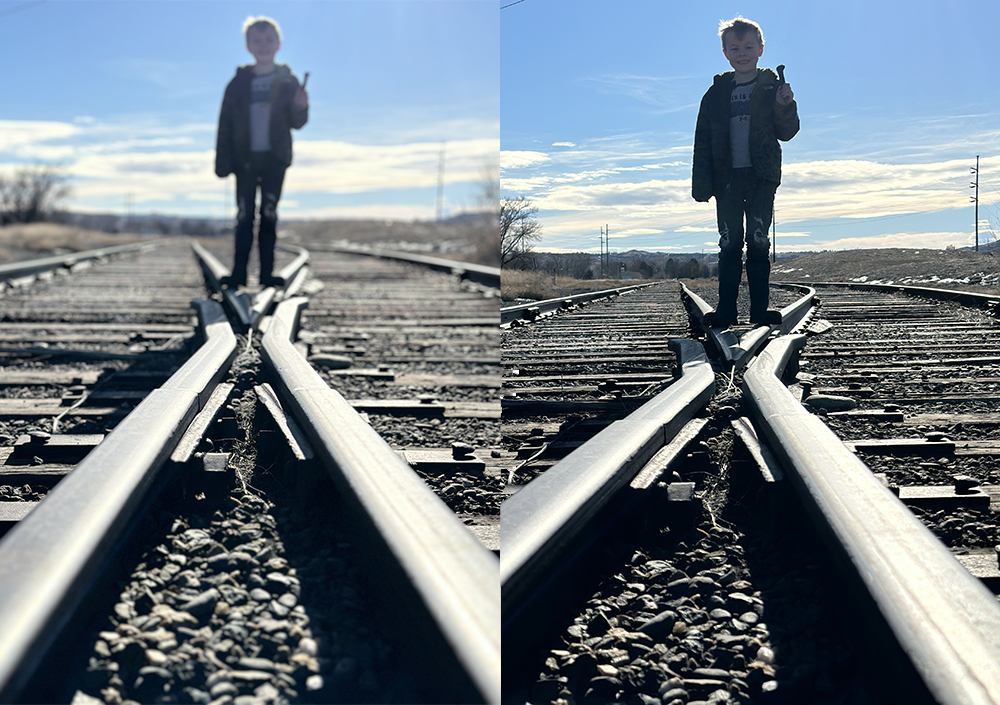 Using low aperture, like the photo on the left, is an expressive and artistic way to replicate a human eye like perception. Perhaps focusing on the middle ground and not my son sends an almost negative message, a child ignored, the viewer unable to distinguish if he is smiling and what he is trying to show me. The higher Aperture on the right makes the image appear flat, but I can see he has proudly found a railroad Spike
Shutter Speed
For all shots use Shutter Speed 1/100
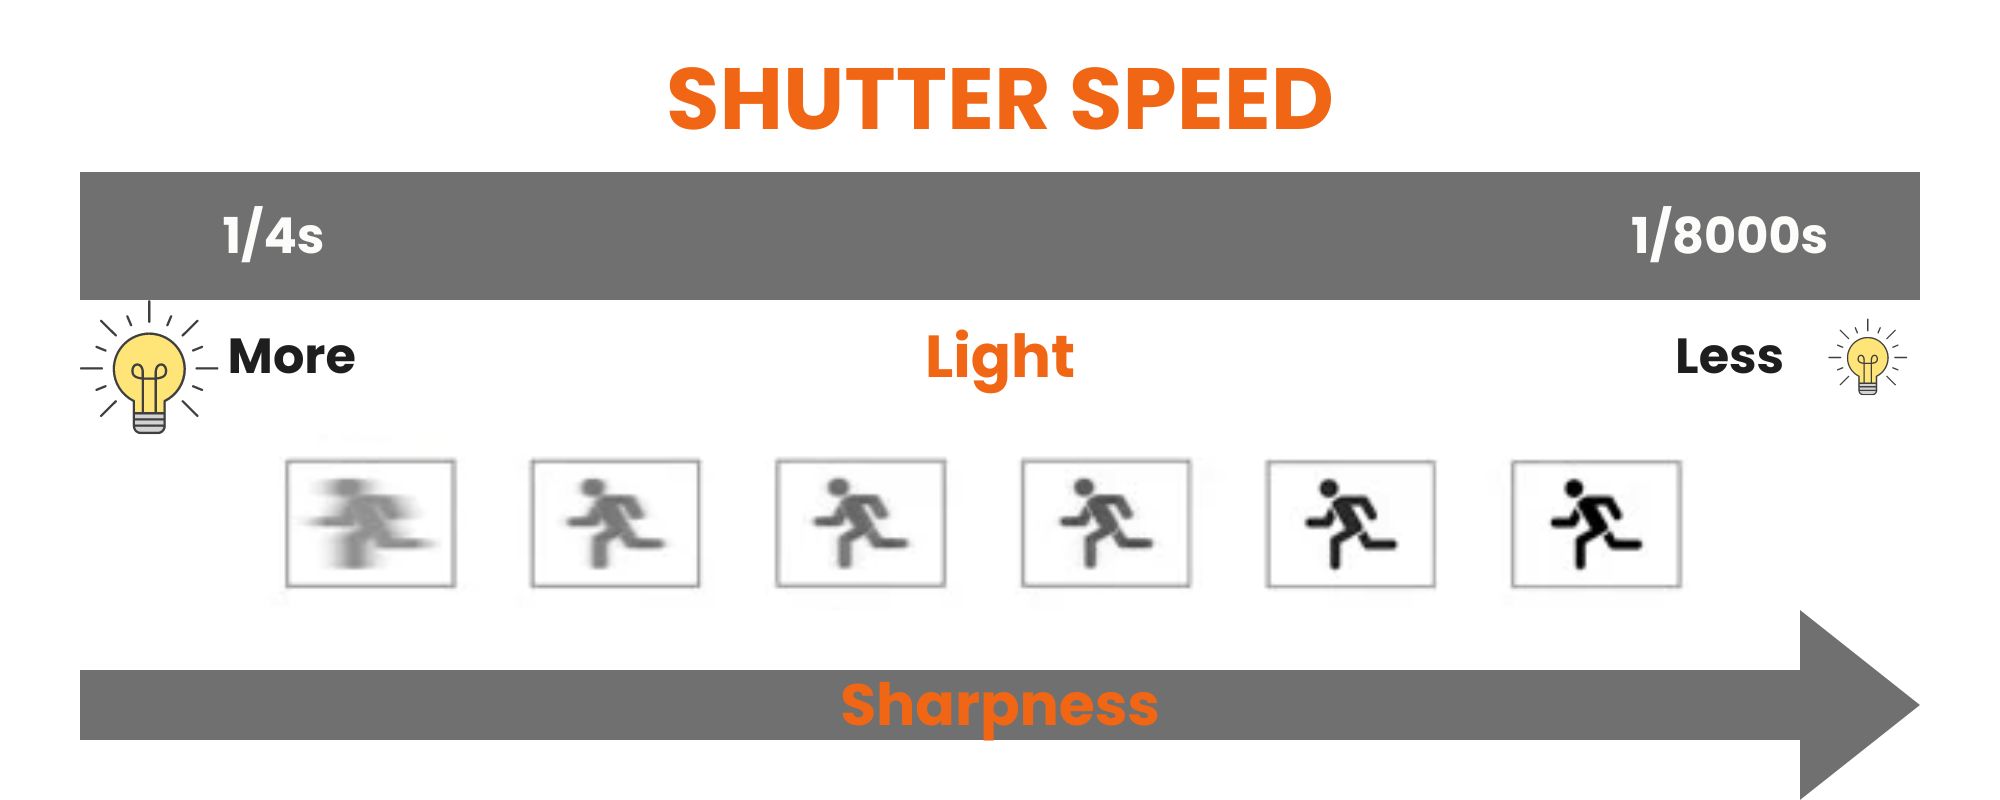
Shutter speed is expressed as a ratio, length of time light is exposed to the camera sensor per second. You will see it written as either 1/100 or just 100. A shorter or faster shutter speed will allow less light and information given from that light to be recorded in a single shot, essentially freezing a moment in sharp clarity. The effect is a decrease in overall exposure of the image as well as less blur from motion.
A slower shutter speed will allow more light, and information given from that light, to be recorded in a single shot. This effect can not only increase overall exposure or brightness but also communicate movement in the form of blur or lines of motion. For artistic images trying to convey motion this is great, but for the purposes of clinical photography any blur is only taking away from critical information. Therefore, a higher shutter speed is recommended.
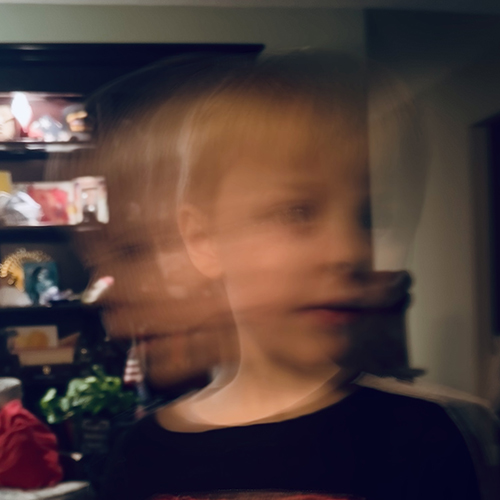
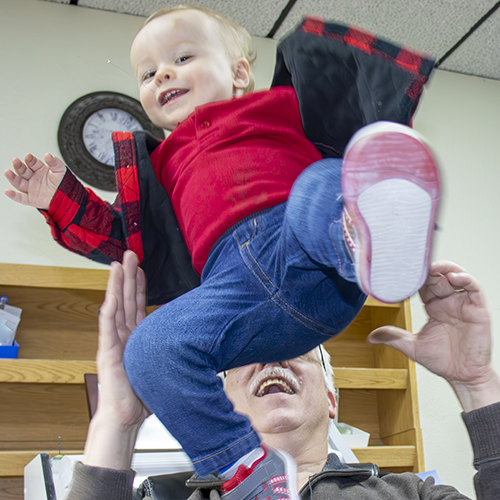
A slow shutter speed effect is so dramatic we can see two distinct facial expressions. Is this an artistic statement about duality or is it just a 6 year old who can’t hold still?
ISO
For all shots use iso 100
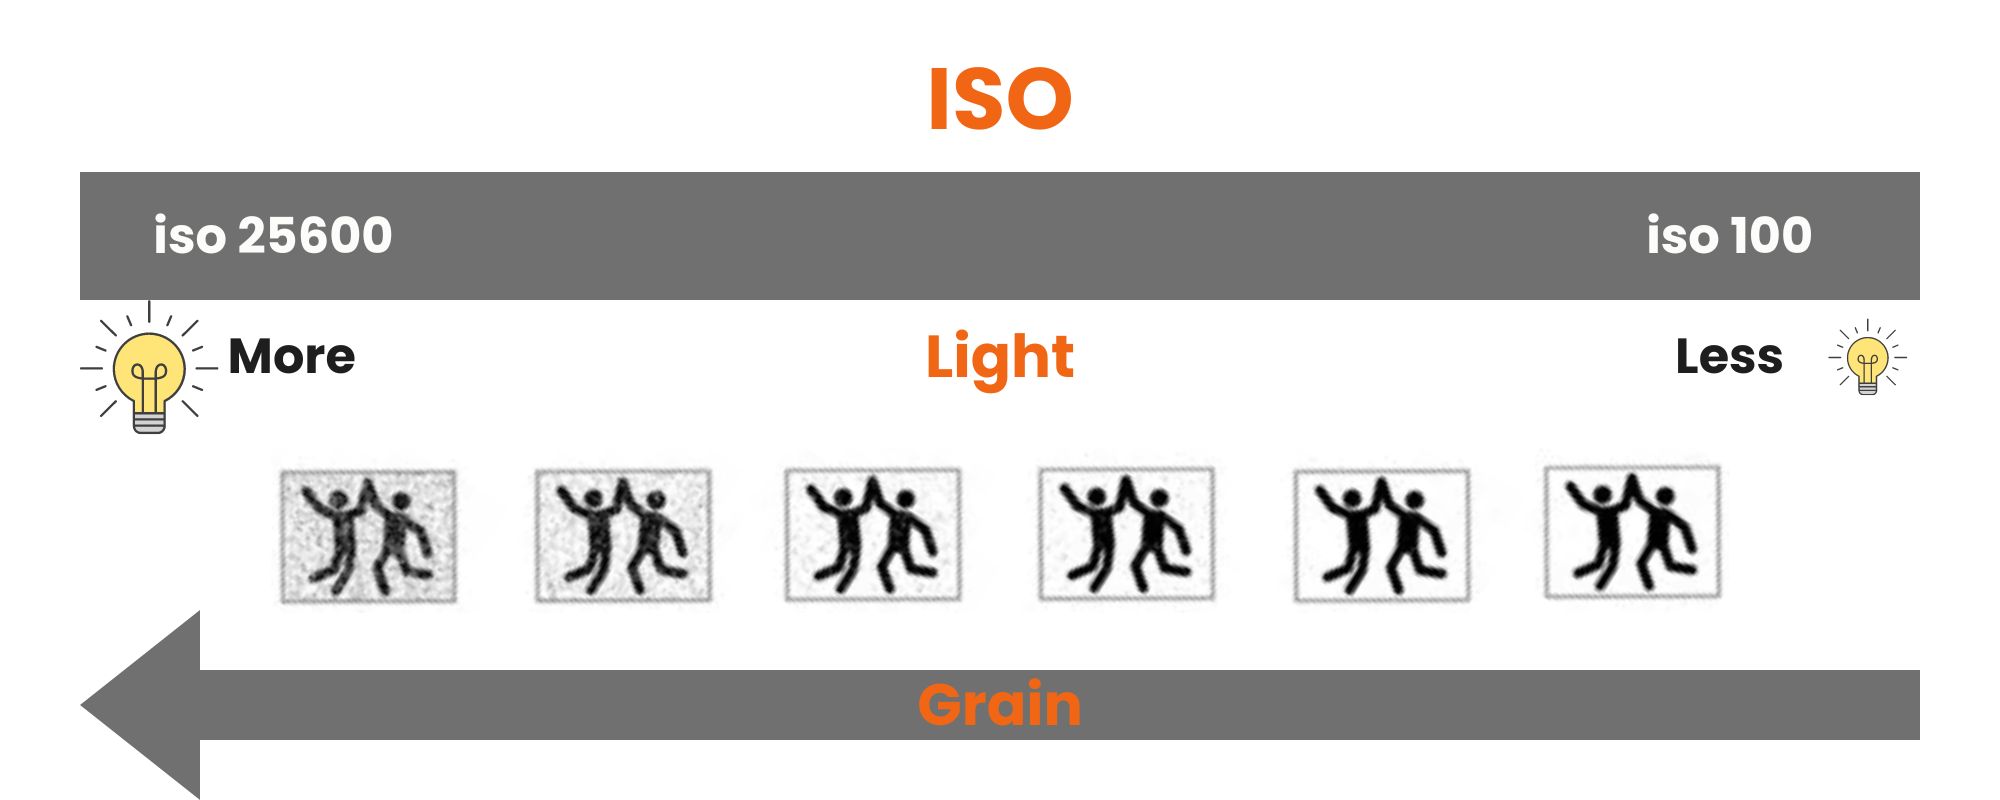
ISO is easily understood as how sensitive the camera sensor is to light. This setting will dictate the graininess or “noise” present in an image. Even though a higher grain or noise does impart a sense of foreboding, chaos, and anger to a photo, this effect is better achieved in post. In almost every circumstance, one would as a rule reduce the amount of noise in an image as much as possible. In fact, when using the lowest ISO available, it is known as the base ISO. So, the biggest reason for a higher ISO would be for low light conditions. In clinical dental photography this is far from the environment. The subject is static and we have flashes to provide a controlled and powerfully direct light source. To get the sharpest image possible, a low ISO is used for all shots.
Aspect Ratio
For all shots, 3:2 Aspect Ratio is recommended
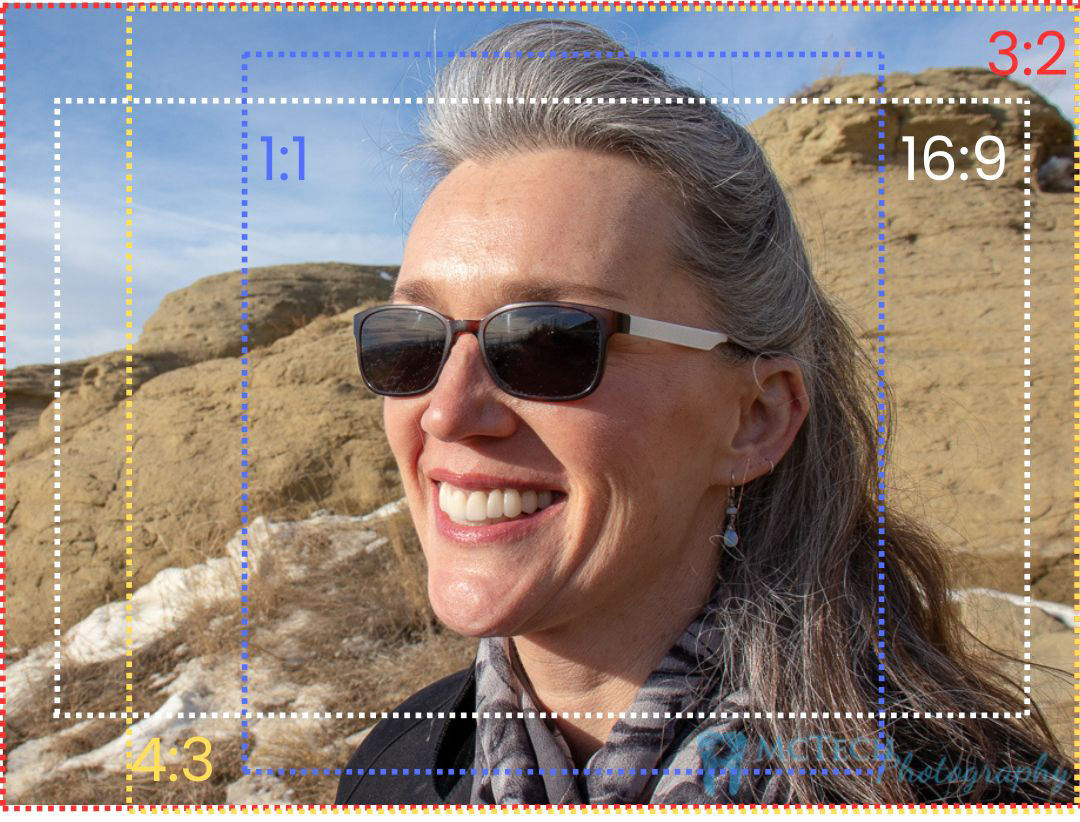 I would recommend the 3:2 ratio. This is the recommendation with either full sensor or crop sensor cameras. My reasoning has context, and harkens back to pre digital photography and the 35mm film. Now, a full-frame 35mm sensor measures 36 mm x 24 mm. You can express this figure as a ratio: 36:24. Divide to lowest common denominator and….3:2.
It is true other ratios are far more visually appealing, namely 4:3 and 16:9. However, a quick internet search will tell you these exist for the purposes of screens, monitors, and smart phones and even some forms of print, the deeper reason is because implementation of compositions like the rule of thirds, rule of odds, symmetry and leading lines play well to these ratios. I personally think this is a very interesting and deep topic. Even before I studied a lick of composition I recognized that cropping my phone pictures was an art in it’self. At the end of the day, all other ratios are simply cropping either vertical or horizontal pixels out of the frame. At the risk of ruffling artistic feathers I’ll say this can just as easily be accomplished in post processing. To get the most from every shot, use 3:2.
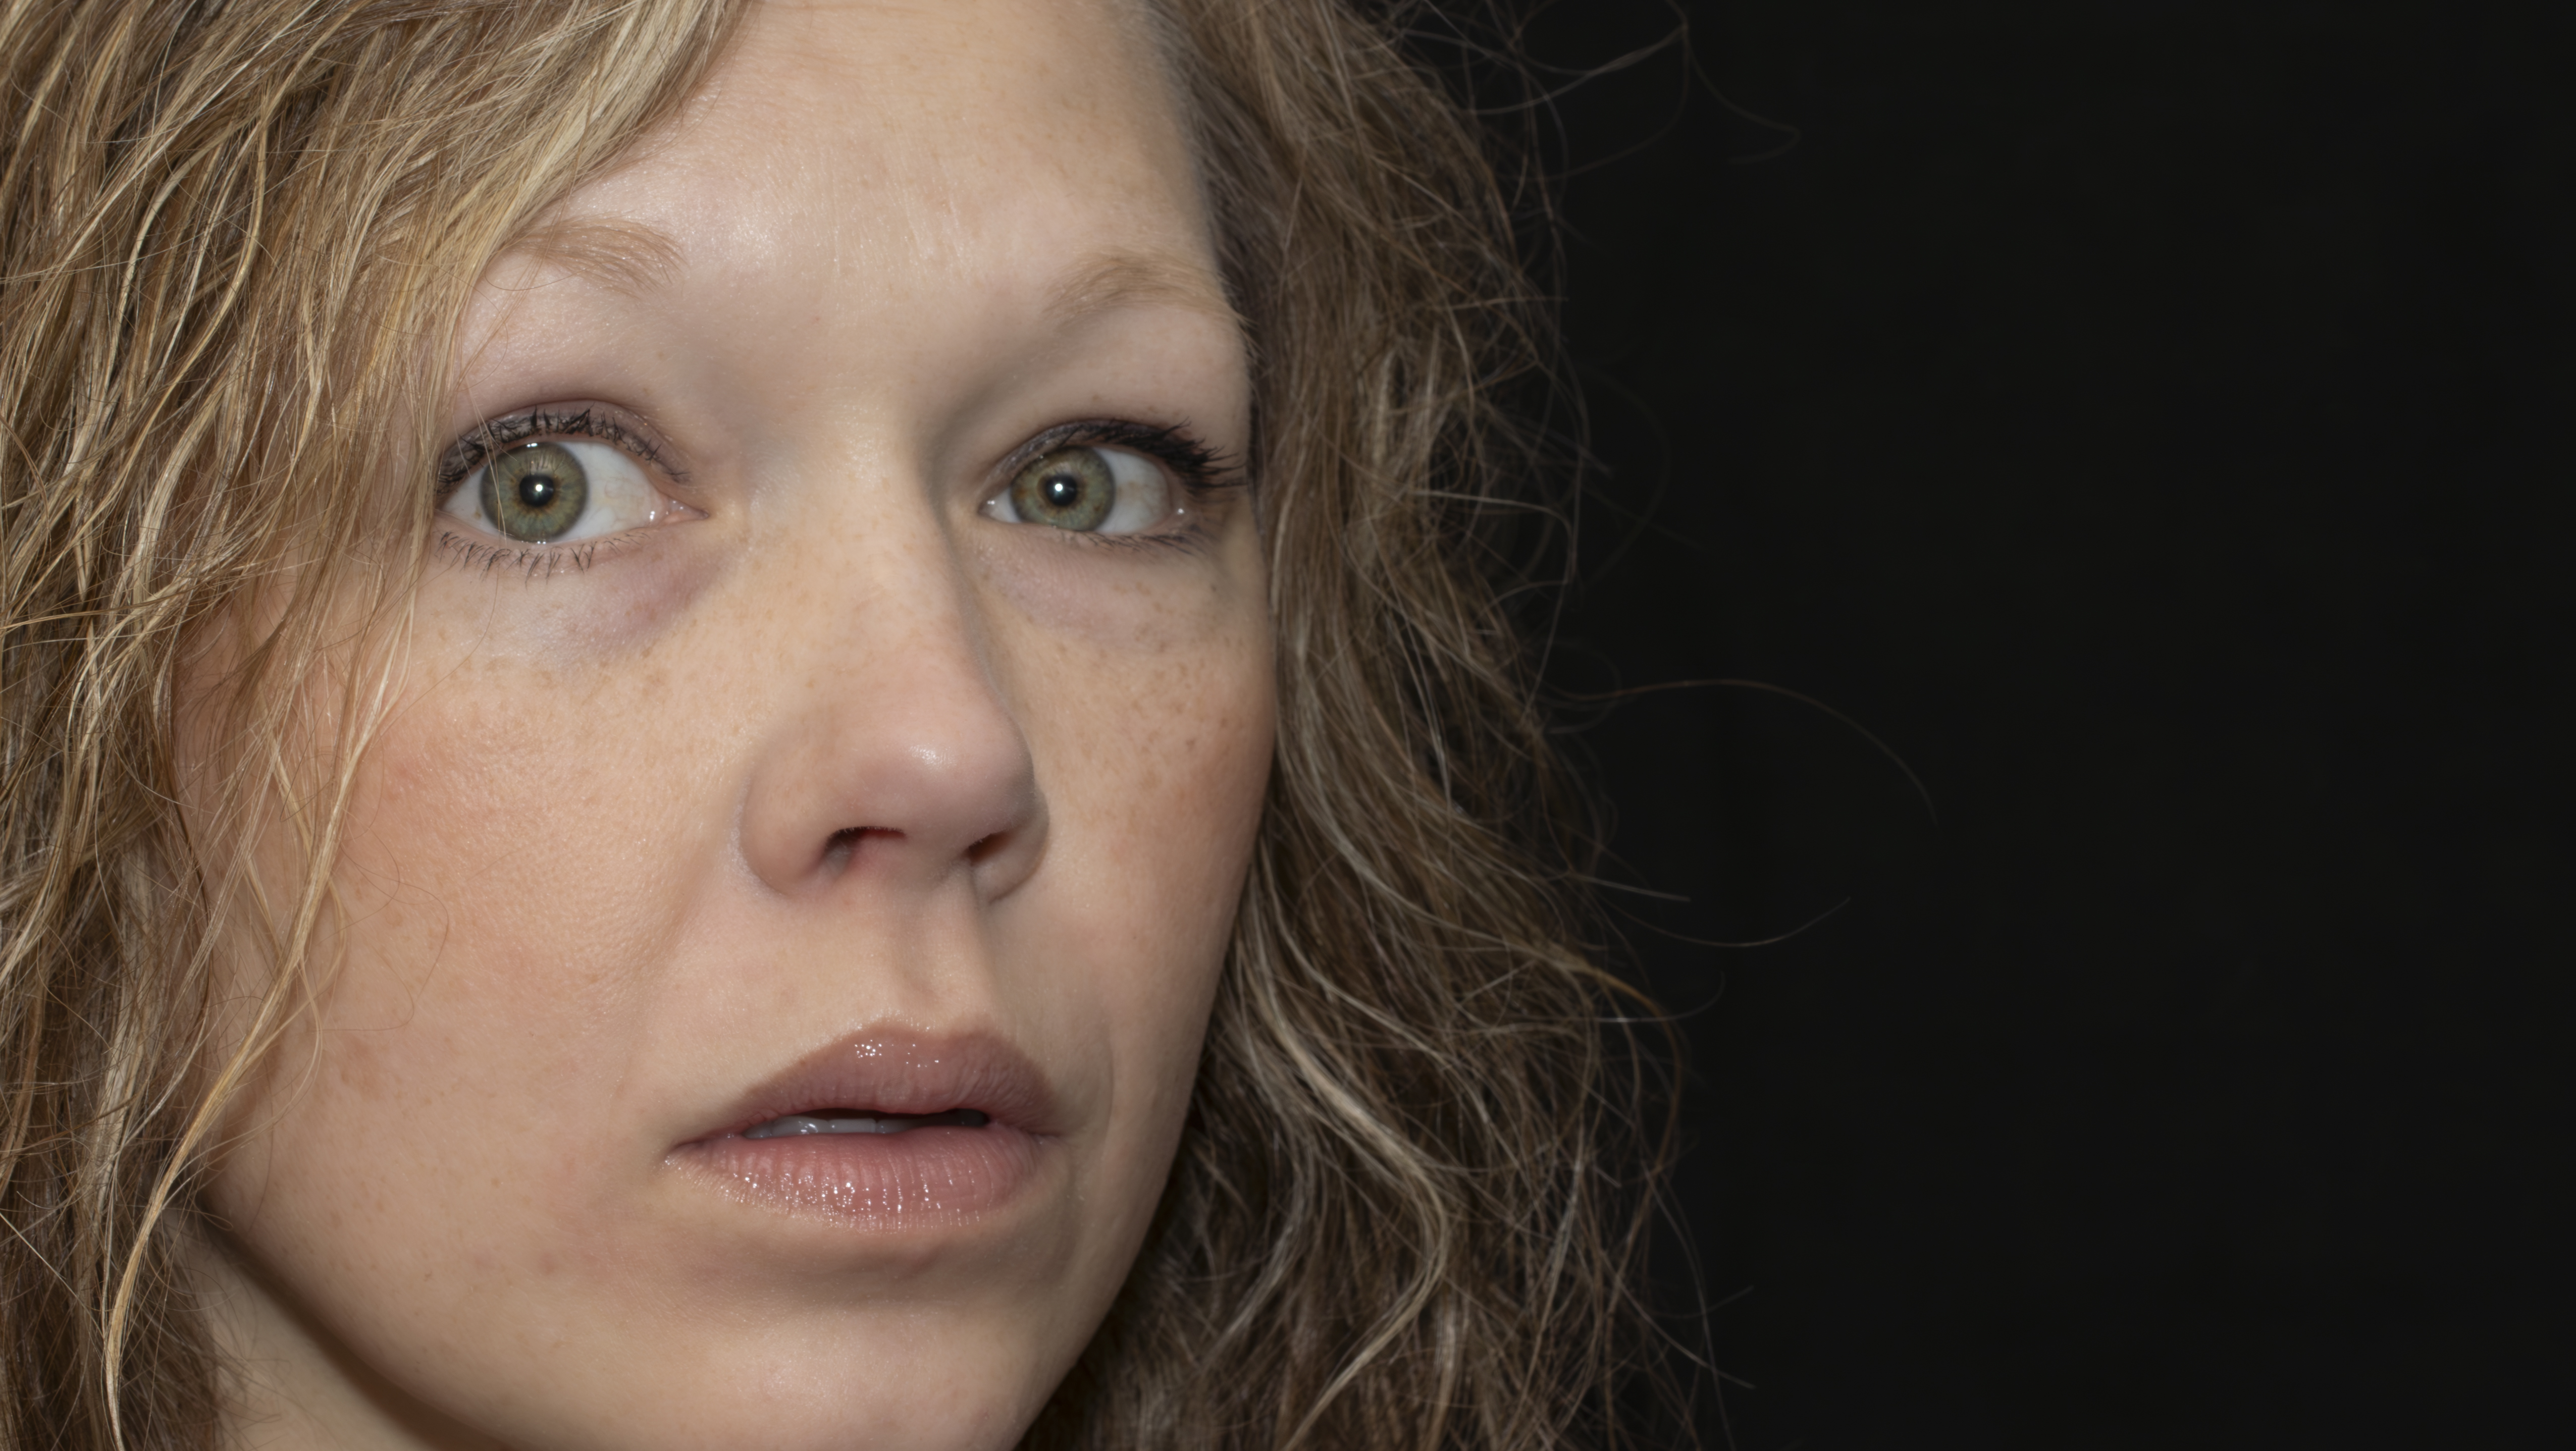
Here is an example of a photo with a 16:9 aspect ratio and composed using the rule of thirds. Becky’s eyes are 1/3 from the top edge and the spot directly in between her eyes is set 1/3 of the way from the left edge.
Shooting Mode
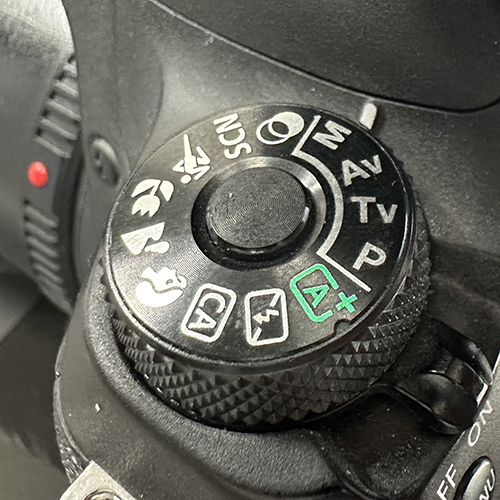
For all shots Manual is required
RAW Format
For all shots RAW format is recommended
RAW images are uncompressed. What this means in comparison to other formats such as JPEG is there are no decisions of quality to be made, Raw is the highest quality image the camera can create. RAW can be thought of as a digital negative. The downside to the Raw format is tied to this strength. The file size is typically so large and hardware-specific that Raw files must be put through post processing software such as adobe lightroom to render them into smaller and more useable formats. However, if one is to utilize grey cards to calibrate images for color and exposure, especially images taken weeks or months apart for before and after shots, then a post processing software like lightroom is a necessity anyway. I know from experience that lightroom will not allow this function with JPG’s. Shooting in raw may neccesitate the learning of another software, but it also vastly simplifies the actual shooting process as it illiminates camera setting options such as white balance, styles and brightness that can make your camera feel like a rubics cube.
